We spend a lot of time boondocking (currently day 52 on this run) so accurate tank level readings are important to us. The sensors that came standard on our rig leave some to be desired. They are able to read 33%. 67% and 100% and their accuracy is largely dependent on the placement on the tank. We first tried to learn / estimate what our tanks levels where based off the readings or burps but soon found we needed something more accurate so as not have to make a run to a dump station.
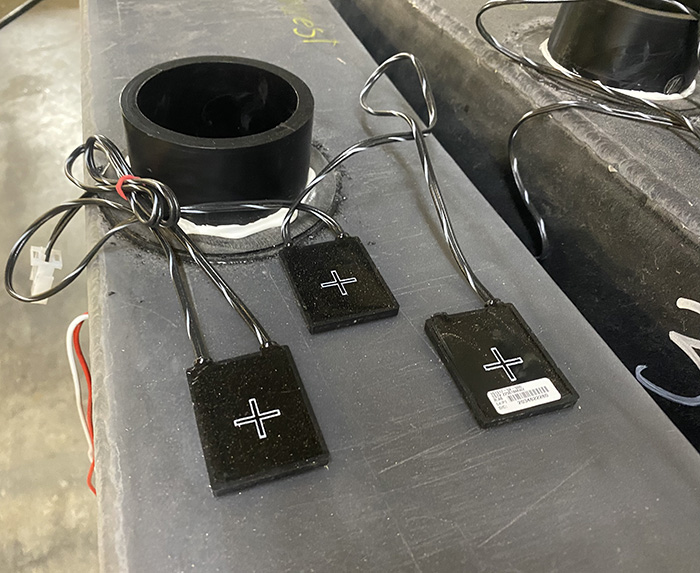
Seeking a more accurate solution we upgraded to See Level sensors. The sensors (senders) can read accurately down to 1/4" giving us a more accurate reading while out in that remote location.
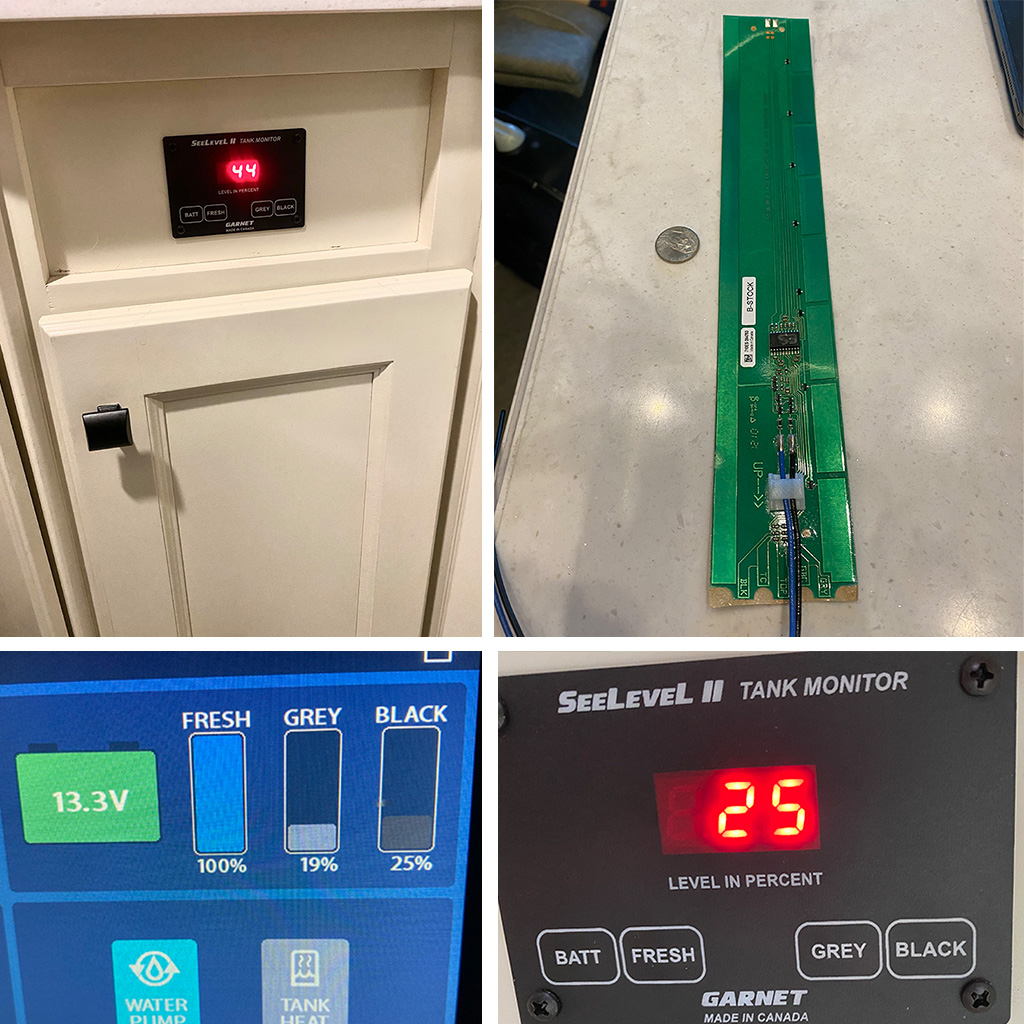
There are several controllers that are available that display the readings, we choose a RVC capable unit and a bluetooth unit. Our RVC capable unit is mounted in our bathroom cabinet and the bluetooth unit is mounted in the wet bay. Choosing the RVC unit allowed us to plug that unit into the Spyder system getting the readings on that screen however this option does require an update from Spyder Controls specific to your model.
We are now able to get accurate tank readings in the wetbay as we dump, fill or flush. I can also connect to the Garnet app and use the bluetooth interface on the wetbay device or see the levels in the bathroom or at the Spyder panel.
The sensors and the controller are relatively inexpensive for an upgrade running just around $250 depending on the type of controller you choose. Installation is another task - you will have to get to the tanks to place the new sensors on. On my model this was not a difficult task as I removed two bolts behind the rear wheel to place the fresh tank sensor and took advantage of exposed gray and black tanks while in service.
Overall we have been happy with the upgrade and as we currently sit in the national forest I know exactly where my tanks are before we need to plan on our next stop.
I’m glad you reposted this from the old Vanleigh owners site. I had bookmarked that as this is something high on my to do list.
I’ve got a couple of questions on your install if you don’t mind answering them. Did you go with two separate See Level panels, one in the bathroom and one in the wet bay? Does the RVC panel also have bluetooth? I’m thinking of adding one See Level panel in the wet bay and then just using the Spyder panel for inside monitoring (but would find the bluetooth handy for checking when I’m not by either).
We have a similar layout with the 39FBB, just a bit longer with the 1/2 bath with the same 3 tanks. Do you remember the height of you tanks when installing the sensors? Are they short enough that you can get away away with the standard length See Level sensor?
Lastly, could you share the steps you needed to perform to integrate with the spyder panel? In the research I’ve done, I thought it required a special cable or splicing into the existing wiring. Was the Spyder update expensive or complicated?
Appreciate you sharing this as I’d really like to have a better look at the status of the tanks beyond the very inaccurate factory level indicators.
I placed the one RVC panel in the bathroom and this was mainly due to keeping the RVC cable run shorter. In my 34RLB I dropped the RVC cable (purchased separately) down into the basement and plugged it into the RSI-9 module for Spyder. There are several empty ports on that module and in the future I will move my Eclipse from Firefly to attach to that module instead of the front of the G6.
I went with the ES sensors which are 12’ in length and I ended up cutting off a few segments to fit them properly on the tank. I think the new “improved” AR senders they have now would be more than sufficient. I will find my measurements on the tanks but my recollection is in the 8.5" range.
We must have been doing the same research as everything I found to update the Spyder panel required Spyder sending a special module used to update the firmware on the device. It turned out much easier than that. Spyder sent me a file by email that I placed on a thumbdrive and then placed that into the back of the Spyder screen where there is a USB. After a reboot of the screen it came to a prompt and I just had to load the files with a press of a button.
Prior to the udpate from Spyder the screen would flash giving me the readings from the original sensors and the SL sensors. I used them in this manner for a while as I had the SL level monitors and was easy to see the levels in between the equally spaced flash. There was no charge from Spyder for the updated files.
We liked the one in the bathroom as it seemed we always wanted to know tank levels for showering or is also easy to check the black while I am sitting there thinking about it.
With the updated from Spyder I can now see the tank levels in several places; wetbay on the bluetooth display, bathroom on the RVC capable display, Spyder panel, Garnett app connecting bluetooth to the display in the wetbay or finally the Eclipse app that is connected to the G6.
I later purchased another display but havent integrated it yet and is another RVC unit being the N2K. I ran into a Victron installer and we were talking about data retention and analytics for my current Victron setup. I like to get trending over a period of time of usage. I already have propane and temp sensors tied into the Cerbo GX and Victron Touch 70 but learned I could tie in the See Levels there. This does not provide a whole lot of benefit outside of being able to use VRM to account for tank capacity over a period of time or how many times I dumped my tanks in a period.
Thanks @RyanB for that information, it’s very helpful.
From what I can tell on the Garnet Industries site the RV-C version isn’t available in BT which is a bit disappointing. I’m probably going to go with the 709-RVC NLP model since I don’t really need the LP or water pump functions along with 3 of the 710-AR II sensors.
Cost looks to be just under $400, which isn’t too much, but still trying to find where I can get the required RV-C cable to connect the SL panel to the G6. Where were you able to find that cable? I could make one, but not sure where to source the connectors for the cable. I’ve made thousands of CAT3,5 & 6 cables along with others in my day job and would like to just purchase a pre made one ready to go.
I did see the Victron integration available as well, but not sold on how much value that would provide to view it on my GX device and VRM. This was a good source regarding that integration if you haven’t already seen it.
I had seen that post during my searches as I worked through the possible implementation. You are right - it really doesn’t provide much value. I was in IT so I also have made thousands of cables. The IT world and providing data back to business likely help weave that passion for data analytics into me.
I purchased the 3M 4pin connectors at a local electronics stores but they are available online. You can also order the RVC cable from Firefly Inc.
You are correct in that the bluetooth model doesnt have RVC and is why I located the RVC unit in the bathroom with a shorter run to the board and the separate bluetooth in the wetbay. If you end up connecting into the Spyder and have a Mira, Eclipse or Coach Proxy you likely could skip using the bluetooth app and connect to the Spyder system.
I installed a See level system in a class a few years back. I think the bluetooth system would be a great way to go. I am not familiar with the RVC system that you mentioned and have a lot to learn about the spyder system. I am not a IT guy but I have worked around electronics all my adult life but technology left me behind long ago. So I have to learn the spyder system and a new 5th wheel that is new but 2 years old. I have warranty that is being wasted while in storage.
Thanks for your input
Ralph
@RyanB Do you remember how much wiring was included with the sensors? I’m trying to get an estimate of how many feet I’ll need for the sensors to connect back to the SL panel. The black and gray are close to the wet bay where the panel will be, but the fresh is back behind the axles on the 39FBB.
Also curious if you removed the underbelly chloroplast to access the tanks to install the sensors or if you just cut access holes? Looking at mine I thought the underbelly was secured with sheet metal screws but they seem to be some sort of large rivet type fasteners that would be time consuming to try and cut off.
Thanks again for indulging me in all of the questions .
The sensors and the display come with around 10" of a wire lead.
When they attach the underbelly to the frame they shoot nails in to secure it. It makes for a quick install of the material for them but not as easy to remove. I had my underbelly off for other repairs and took that opportunity to install the senders. I had looked at it previously on my model and test fit one of the senders through the access hole for the electronic gate valve and was my plan to attach prior to dropping the underbelly and having full access. Access holes from the bottom would be easier than trying to work in that access hole from the basement area if you decide not to cut / pry out the nails. My underbelly has since been replaced with all self tappers.
My fresh tank is also behind the axles on my unit and I recently had to replace my fresh sender. I removed two of the screws from behind the curbside rear tire and had relatively easy access to replace the sender on the tank. The original was damaged at a service center.
If I recall correctly you have a 39GBB in which I think our tank layouts are identical - mine being a 34RLB.
Thanks for the info. I looked at the access hole for the dump valves and didn’t think that would a be a good choice either. Guess I’m going to experiment with removing those nails and if that proves to be too much of a PITA, I’ll probably cut a couple of access holes.
I will definitely investigate this install in the future as the OEM sensors are almost useless. My system is 41LKB but I am thinking tank layout is similar to you guys.
I had the Tishomingo SC install the SeeLevel RVC model last week. I like where @RyanB placed his monitor in the bathroom so we did the same. Unfortunately Spyder is now charging $70 for the software update or $150 for the a kit which includes the update and the network cable to connect from the SeeLevel to the RSI-9 module. Like @RyanB stated the Spyder panel flashes back and forth between the SeeLevel percentages and 0% (Tish cut or disconnected the old tank sensors).
I had several phone calls with Spyder and they said the updates are now provided via a hardware programmer switch that plugs into the Net port on the front of the G6. They said the reason for this was due the reliability of the USB file updates were not being great for larger upgrades so they quit offering any updates via USB. I am not sure that I will pay the $70 for the update as it works fine and I can see the level from the Vegatouch app via the Eclipse module. Tish made the network cable so I didn’t need to purchase that.