Roof maintenance without lap sealant

I thought I’d share a different option of sealing the RV roof from the traditional frequent reapplication of lap sealant.

As it’s getting near winter time here in Colorado (snow forecast next weekend), I was researching alternatives to the standard lap sealant being applied (and according to the manual silicone). I chose to use Eternabond tape for sealing the front & rear cap transitions as well as the edges. I’d seen a number of videos and articles mentioning Eternabond as a good alternative that can outlast the typical sealants. When properly applied it can last 20+ years.

I used the following steps in the process:

  • Thoroughly clean the roof
  • Remove any existing silicone based sealants
  • Carefully apply the tape

The first step in the process was to ensure the roof is clean. I used Simple Green to clean the roof along with a soft bristle drill brush to agitate it and remove the built up dirt. I think it did a pretty decent job.

Starting at the front and working my way back to the ladder.

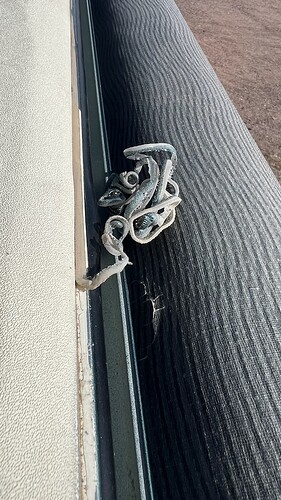
After I finished cleaning the roof it was time to start removing the old silicone that was in place along the roof edges. That was a slow process working down each side. Once it was all removed, I went back and used Goo Gone to remove any residual silicone and final clean of those edges using Simple Green again.

Scraping off the silicone being careful to not tear the roof membrane.

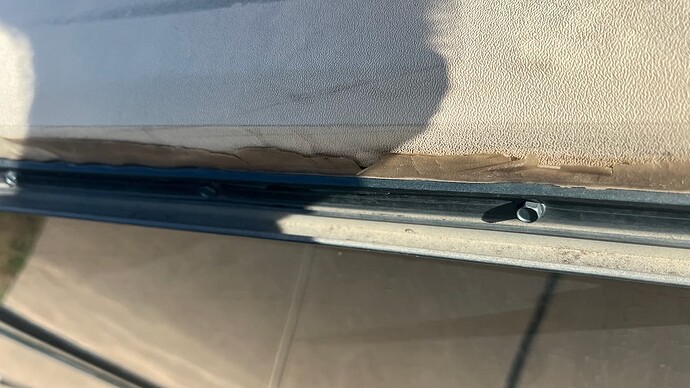
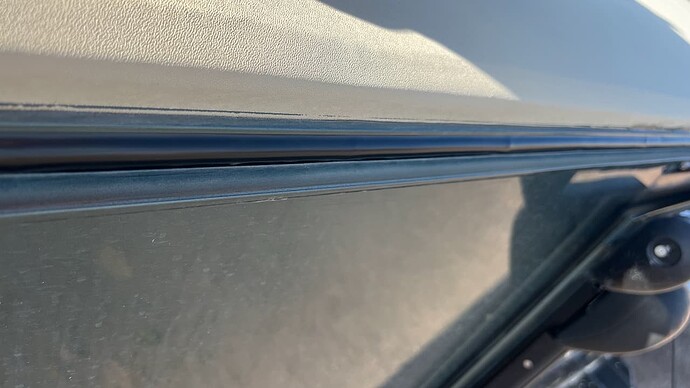
During the process I noticed that the screw channel running down both sides attaching the roof was missing the trim cover. I purchased 100’ of trim cover and installed that prior to applying the tape.

Screw channel missing the trim (along with the spots of peeling silicone)

New trim installed

The last step was to slowly apply the Eternabond tape. I used one roll of 4" x 25’ cut to length to apply of the front and rear cap transitions last year to test it out. It held up quite well, which helped in deciding to do the roof sides. For the sides I used two 2" x 50’ rolls which allowed for no breaks in the tape. Once finished applying it’s a good idea to use a roller to press down the tape to insure a good seal and getting it into any corners.

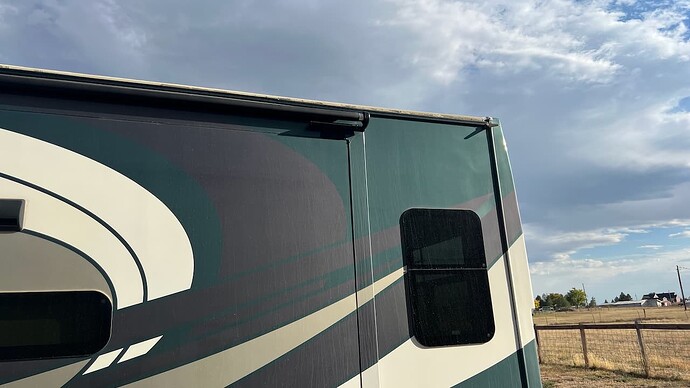
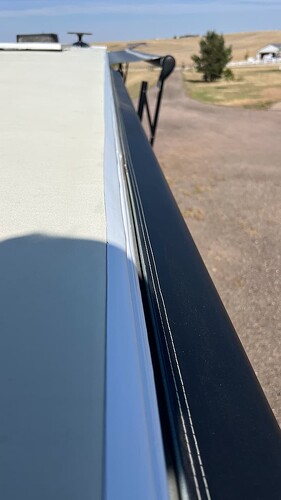
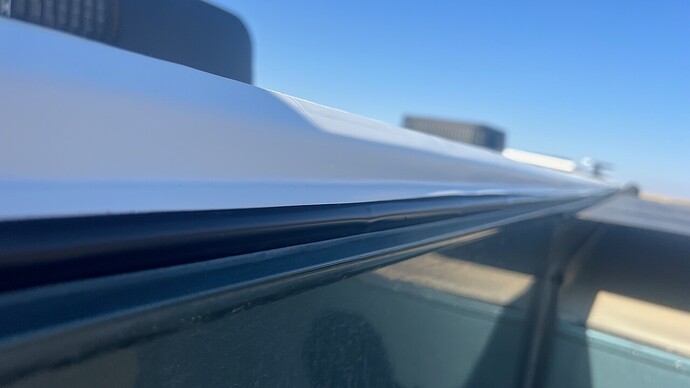
Here’s a few pics of the before and after.

Before (you might be able to zoom in and see the old peeling silicone)

After

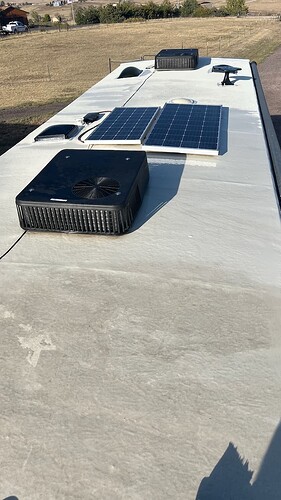
After (full length shot)

I’m pretty pleased on how it turned out and not having to worry about those roof seams leaking. I think it even looks better than it did originally, even though it’s not real easy to see from the ground.

I’ll still be using the lap sealant on the roof penetrations (vent fans, skylight, etc.)
as those may require replacing in the future and it’s a lot easier to remove the lap sealant than it would be to remove the Eternabond.

Just another option for those that might be interested.

Stuart
Hi Stuart
Great presentation, very informative with the pictures, was it hard to keep it from creasing during that long side ?. Also think it is a good idea not to tape the roof penetrations, watched a video on trying to removing tape, not easy, very messy
Good Job

Thanks Spud!

It was a bit challenging to keep a straight line. I started on the front passenger side since that’s more hidden with the awning to get my technique down in that section. Bottom line is just go slow and apply about a foot or two at a time. I applied a bit a tension to the tape as I lined it up and pressed it down. Once it’s on the roof it’s not moving, so be deliberate and slow!

Overall it didn’t cost a lot.

  • 1 - 4" x 25’ roll Eternabond $40 (front and rear cap)
  • 2 - 2" x 50’ rolls Eternabond $80 (roof sides)
  • Screw channel trim $40
  • Roller to press down and seal $8

Under $200 total and a few days of work.

I think this will outlast the RV (and maybe me LOL) compared to the lap sealant.

Stuart

Hello everyone

Just joined this forum, with a 2016 Van Leigh rl265- but have a similar question regarding roofs. I believe it is an alpha system. Any thoughts about whether eternal bond will work over the original TPO roof and original lap sealant? I had previously called Alpha systems on another RV that had that roof, and of course they did not recommend anything other than lap sealant And discouraged use of eternal bond. But the truth may be somewhere else anyone having used it for a long enough period of time to know whether it degrades the TPO roof or does not seal to the lap sealant.

Based on my prior research, I only used alcohol and not anything else to clean the surface, but there was a lot of opinions about various products, and I did not use the Eternabond primer because I couldn’t get it.

FYI, called the manufacturer Tippin and they said you can’t do anything clean the roof until you have to replace it!

Hi DGV11 - My Beacon (pictured in the 1st post) has a TPO roof (as mentioned in the owner’s manual) and there were no problems with the Eternabond tape sticking. The key is proper prep and cleaning both the roof membrane and the existing lap sealant.

I just finished applying the Eternabond tape to the sides of the roof, but had previously used Eternabond to seal over the front and rear cap transitions as well as a small self inflicted tear when replacing the A/C unit.

I sealed the front & rear cap transitions about a year and a half ago and have not seen any deterioration in the tape or the roof membrane. I placed the Eternabond directly over the lap sealant after I thoroughly cleaned it using Simple Green and soft bristle brush.

My main motivation with using the Eternabond tape was it will last 20+ years so I won’t have to reseal the whole roof every few years with lap sealant. I still use the lap sealant (Dicor branded) to maintain the roof penetrations of the vent fans, skylight, etc. The lap sealant is considerably easier to remove than the Eternabond tape and I might end up replacing those vent fans or skylights.

There’s a few you tube videos from others that have done the same project and have reported great results and still holding up after multiple years.

Thanks. I have applied a Eternabond tape to another RV, but it was against the advice of Alpha systems, which made me a little concerned. I did it because enough other people were doing it and when I tried it, it felt like it created a bond better than my dicor.

It creates an excellent bond in my experience using it too. I don’t have any concerns using it or plans to remove it (it’d take a lot more work removing it too! LOL).

You should have a Dicor brand TPO roof (same as mine) as I believe Vanleigh didn’t switch to Alpha branded roofing membranes until the 2021 model year.

1 Like

Just confirming you are correct. Vanleigh switched from dicor to Alpha for the 21 model year forward. I worked with Alpha a lot during the first few months of owning my unit and they acknowledged Vanleigh installed our membrane incorrectly like due to them being new to the product.

I have had plans for Flex Armor for sometime.

Stuart, How far down is the bottom of the tape, (on the sides) is it just above the plastic trim that you replaced or does the tape cover the trim?

Hi Chuck,

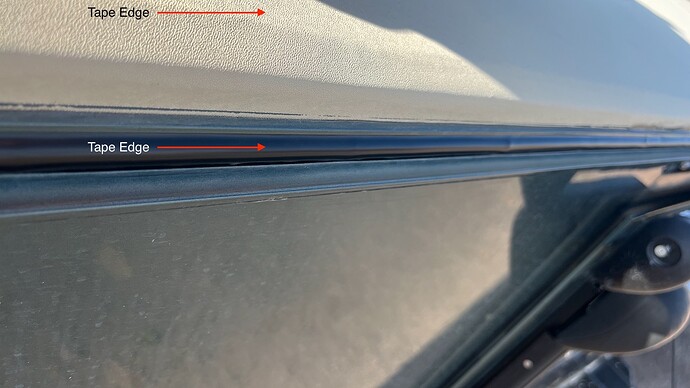
I used 2" wide tape which was enough to cover the roof membrane and about half way onto the trim that covers the screw channel. I didn’t want to completely cover the trim cover in case I ever needed to remove it to access the screws behind it. I’ve seen some people use a wider tape 4" or 6" to allow for wider coverage, but I thought 2" was sufficient.

I thought I had a better close up picture showing the edge with the tape on, but I didn’t. It’s snowing pretty good now, so I added some arrows to the pic below to show the approximate locations of the tape edges along the roof sides.

Hopefully that makes it easier to visualize.

Roof edge

Thanks, that helps me understand how you did it.