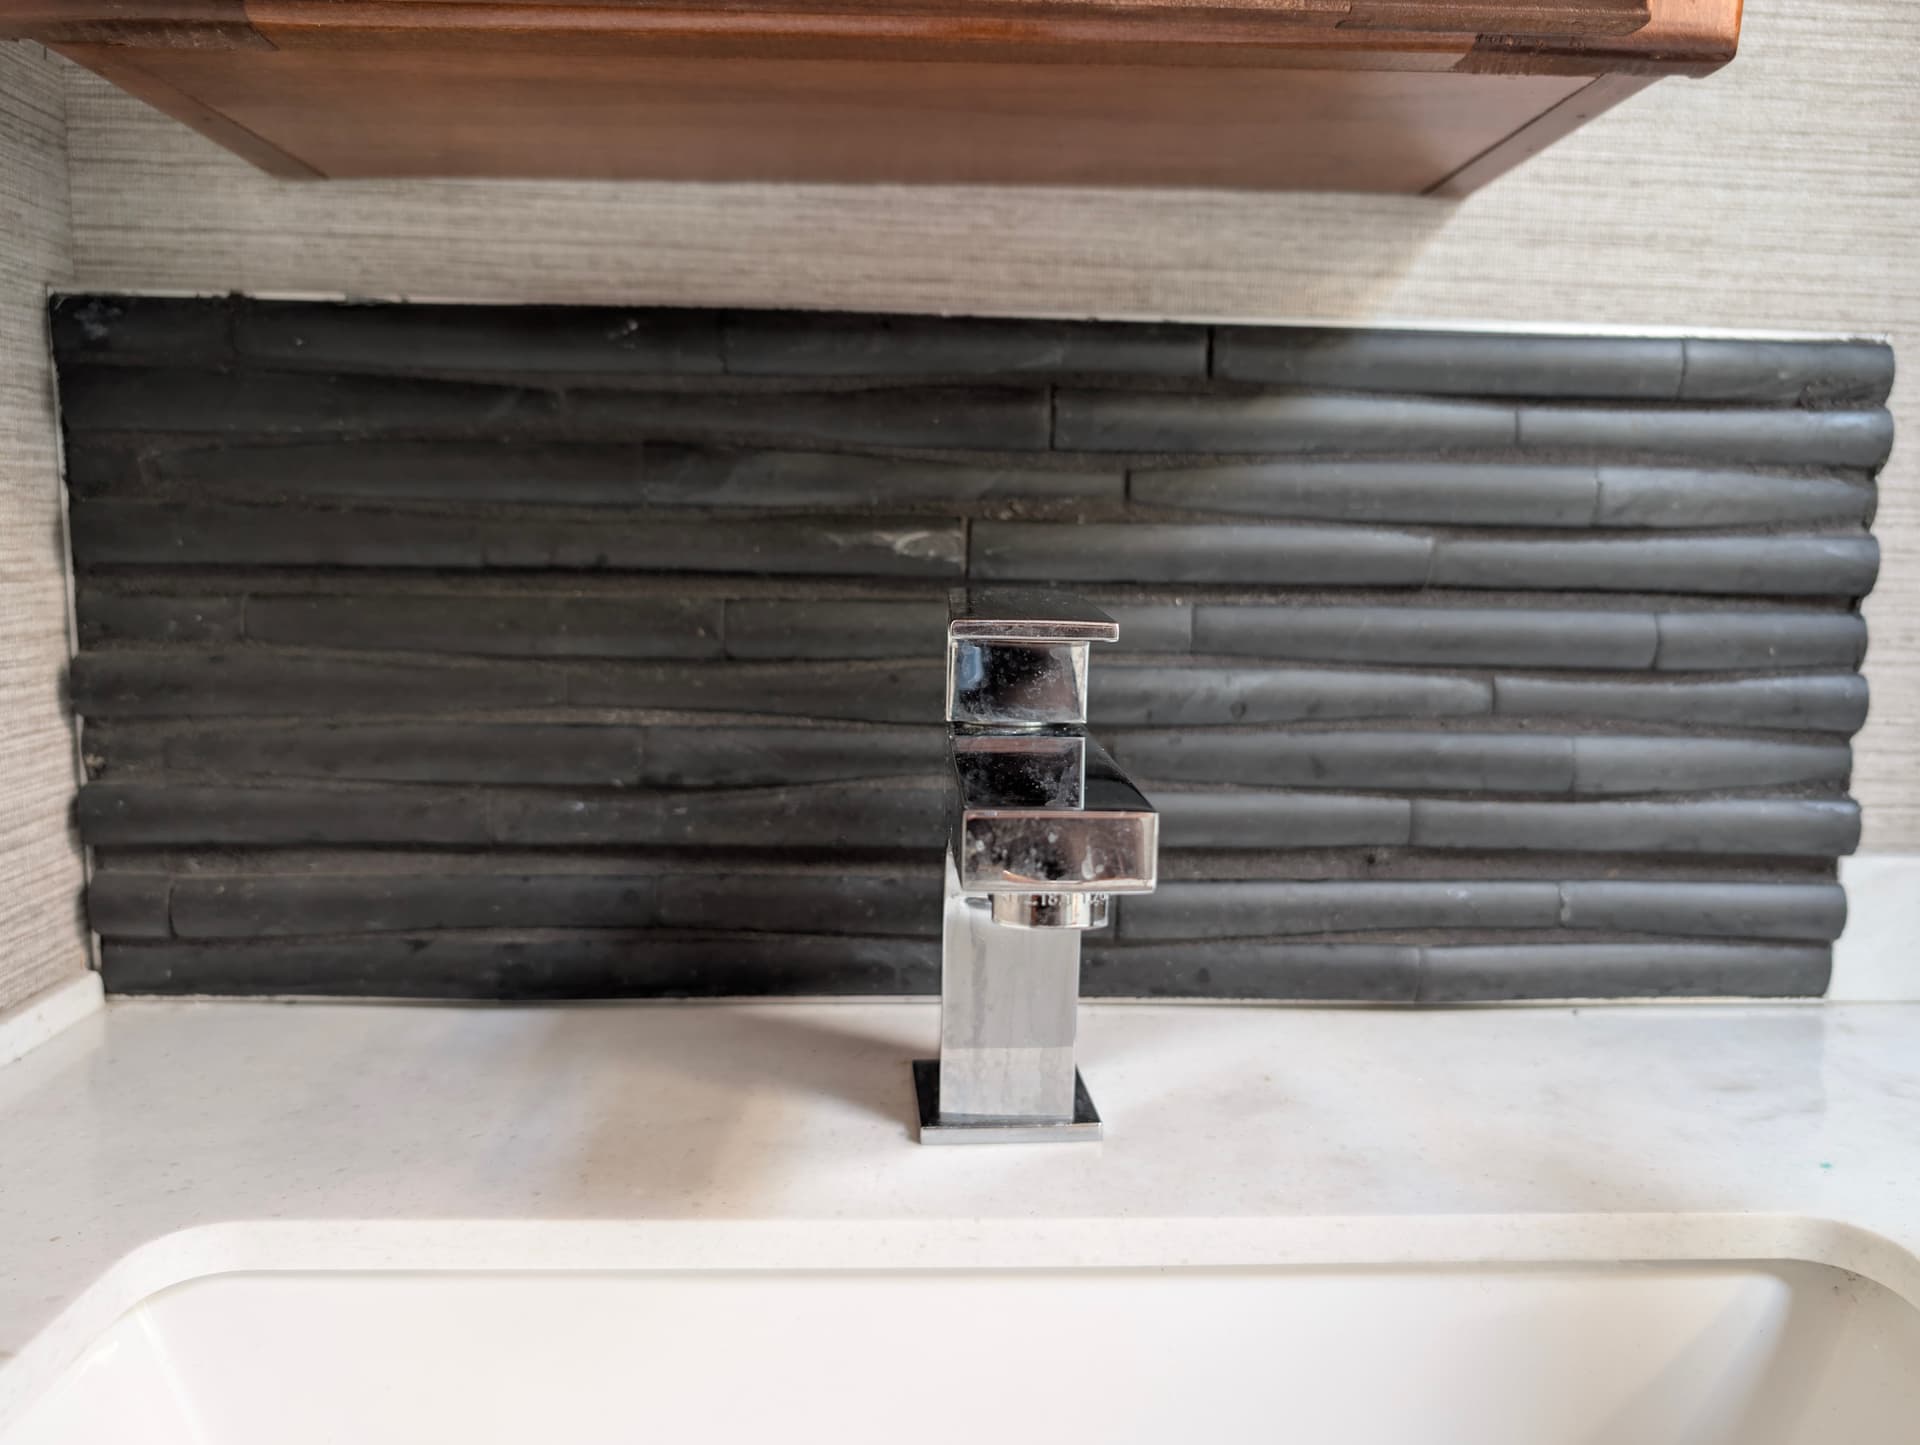
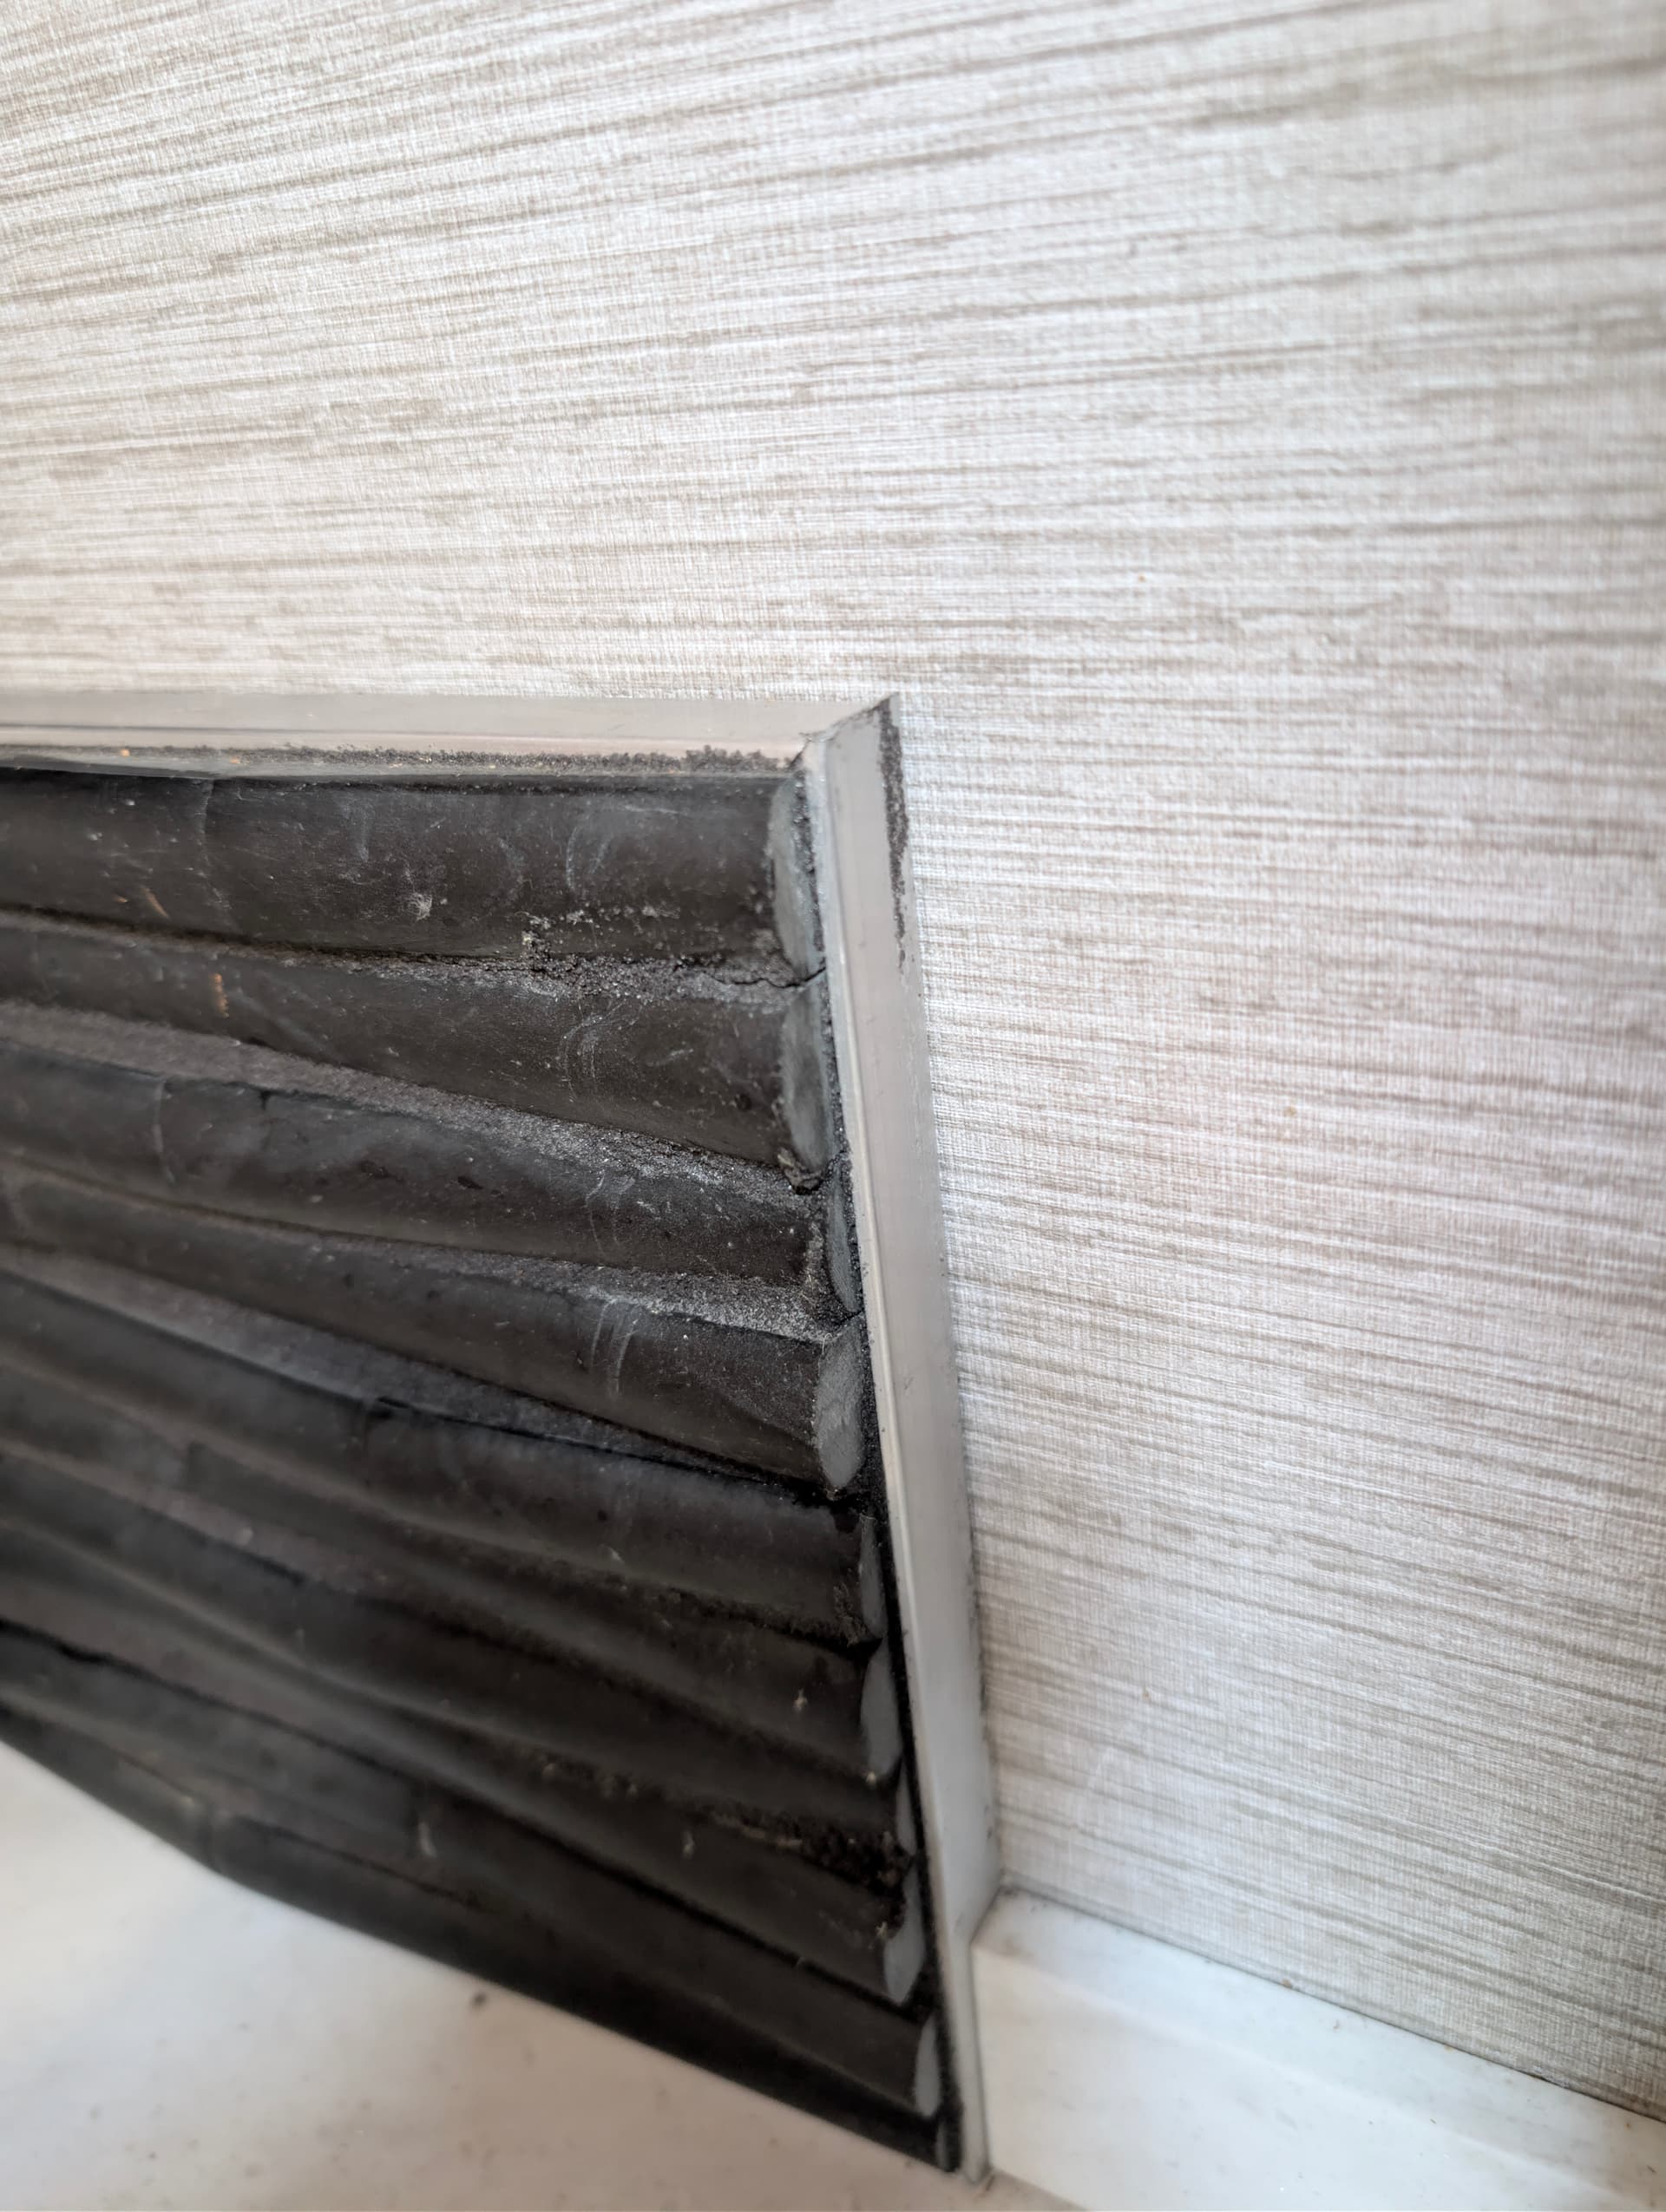
Has anyone here removed the backsplash in their bathroom and if so, how did you accomplish this? I am assuming all the backsplashes were assembled in a shop prior to installation within the rig. It also appears as if the tile is placed and grouted inside an aluminum pan. If that’s the case, my next assumption is that the whole thing is then glued to the wall…
We have a different style/looking backsplash in both bathrooms. Ours is glued on and on some recent rough roads they came off and I could see the glue on the backsplash. I just re glued then a bit more thoroughly to insure they stay attached.
If you’re looking to remove them you might be able to slowly pry them off using a flat bladed scraper. It might tear off the wallpaper from the wall, but if the replacement is the same size it should cover up that missing wallpaper.
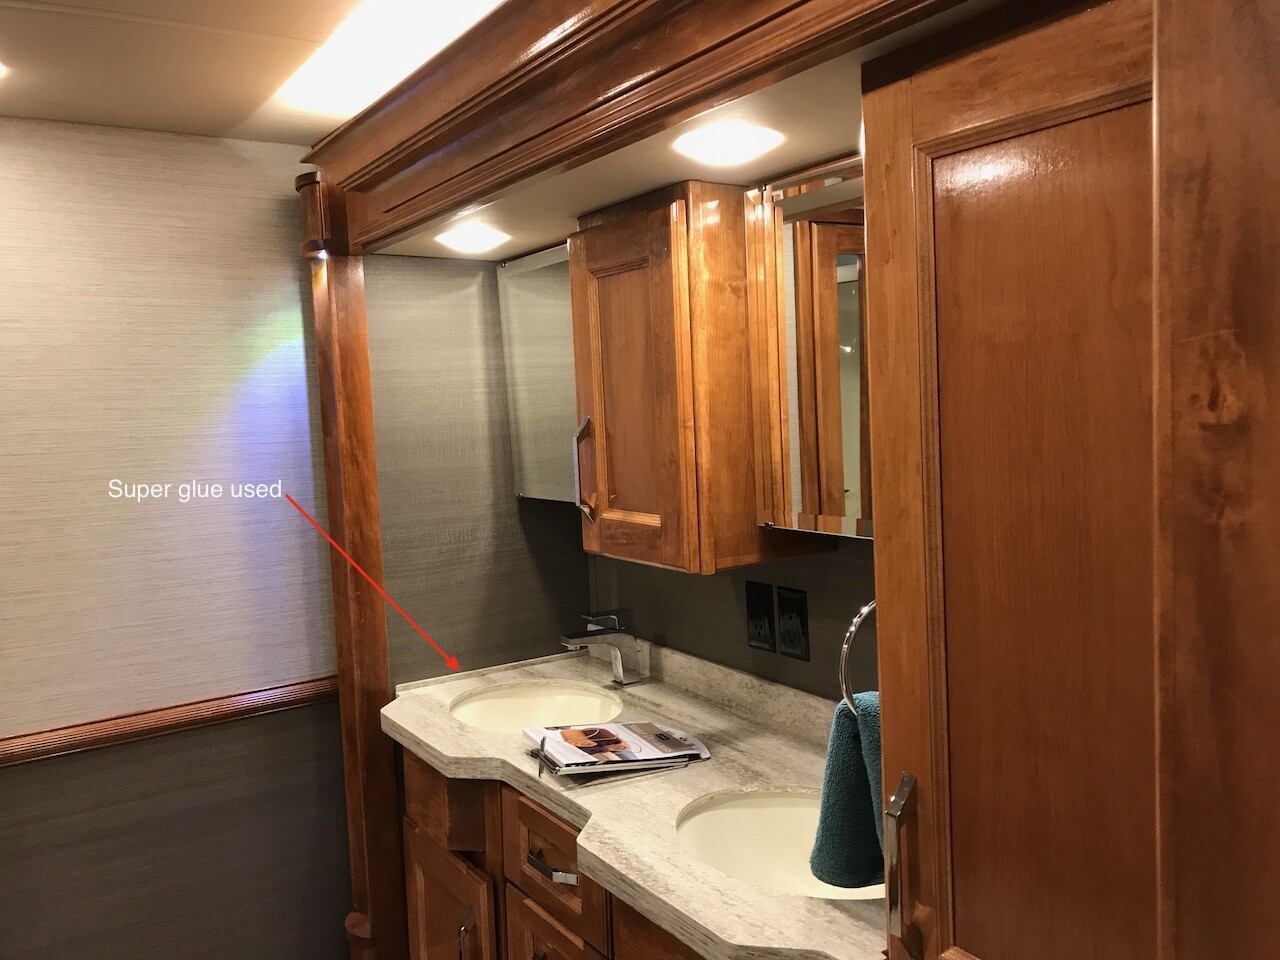
I figured that it would destroy the wallpaper at the very least and, based on how strong the glue is, destroy the section of wall it’s attached to. Obviously, I prefer the former as it makes far less work when reinstalling. What type of glue did use you use to reattach?
For attaching the piece to the wall I think I used a gorilla glue product, can’t recall for sure as it was a few years ago. I also used some super glue to secure the bottom edge of a smaller trim piece to the counter. Both have held up pretty well so far.
Stuart, thank you for the insight. ![]()
I had my backsplash fall off a few times and had a tube of Liquid Nails laying around that I used that secured it for many 10s of thousands of miles after. I did have my backsplash removed at one point at the Tiffin Service center as they were cutting it down for a better fit at the oven - they did removed it exactly how Stuart described. There wasnt a whole lot of adhesive applied from the factory so hopefully you have the same situation. Good Luck.

A million thank yous for the photo as I have been curious how the backsplashes were constructed. I had incorrectly surmised the tile was assembled and fastened to a metal tray, much like a sheet pan, and then glued to the wall. Mine hasn’t started to come loose yet. I had been thinking I might want to replace all of them because they’re so sloppily done with grout in places it shouldn’t be and miters out of square, so I was trying to get an idea of how difficult it would be. I mean, I couldn’t do a worse job than they did… Ryan, your pictures and experience have once again proven to be invaluable. Personally, you have saved me countless hours researching and provided me with confidence in knowing I can do this…
Thanks - I am always glad I can help! I spent a lot of time in Redbay and Tish making sure our rig was the best it can be and subsequently learned a lot about how Vanleigh / Tiffin built and corrected these rigs and came back with a lot of pictures and video.
1 Like
UPDATE: We had to replace our insignia range after the oven knob got stuck in the on position. After much scouring of the internet, we purchased a Costway model very similar in appearance to the Insignia we replaced. Prior to purchasing, we got out the manual for the Insignia and copied it’s dimensions to prevent ending up with one too big or small. The Costway’s dimensions were EXACTLY the same. We had sooooo much fun removing the old stove and then, converting the new stove from NG to LPG was a walk in the park/s ![]()
![]()
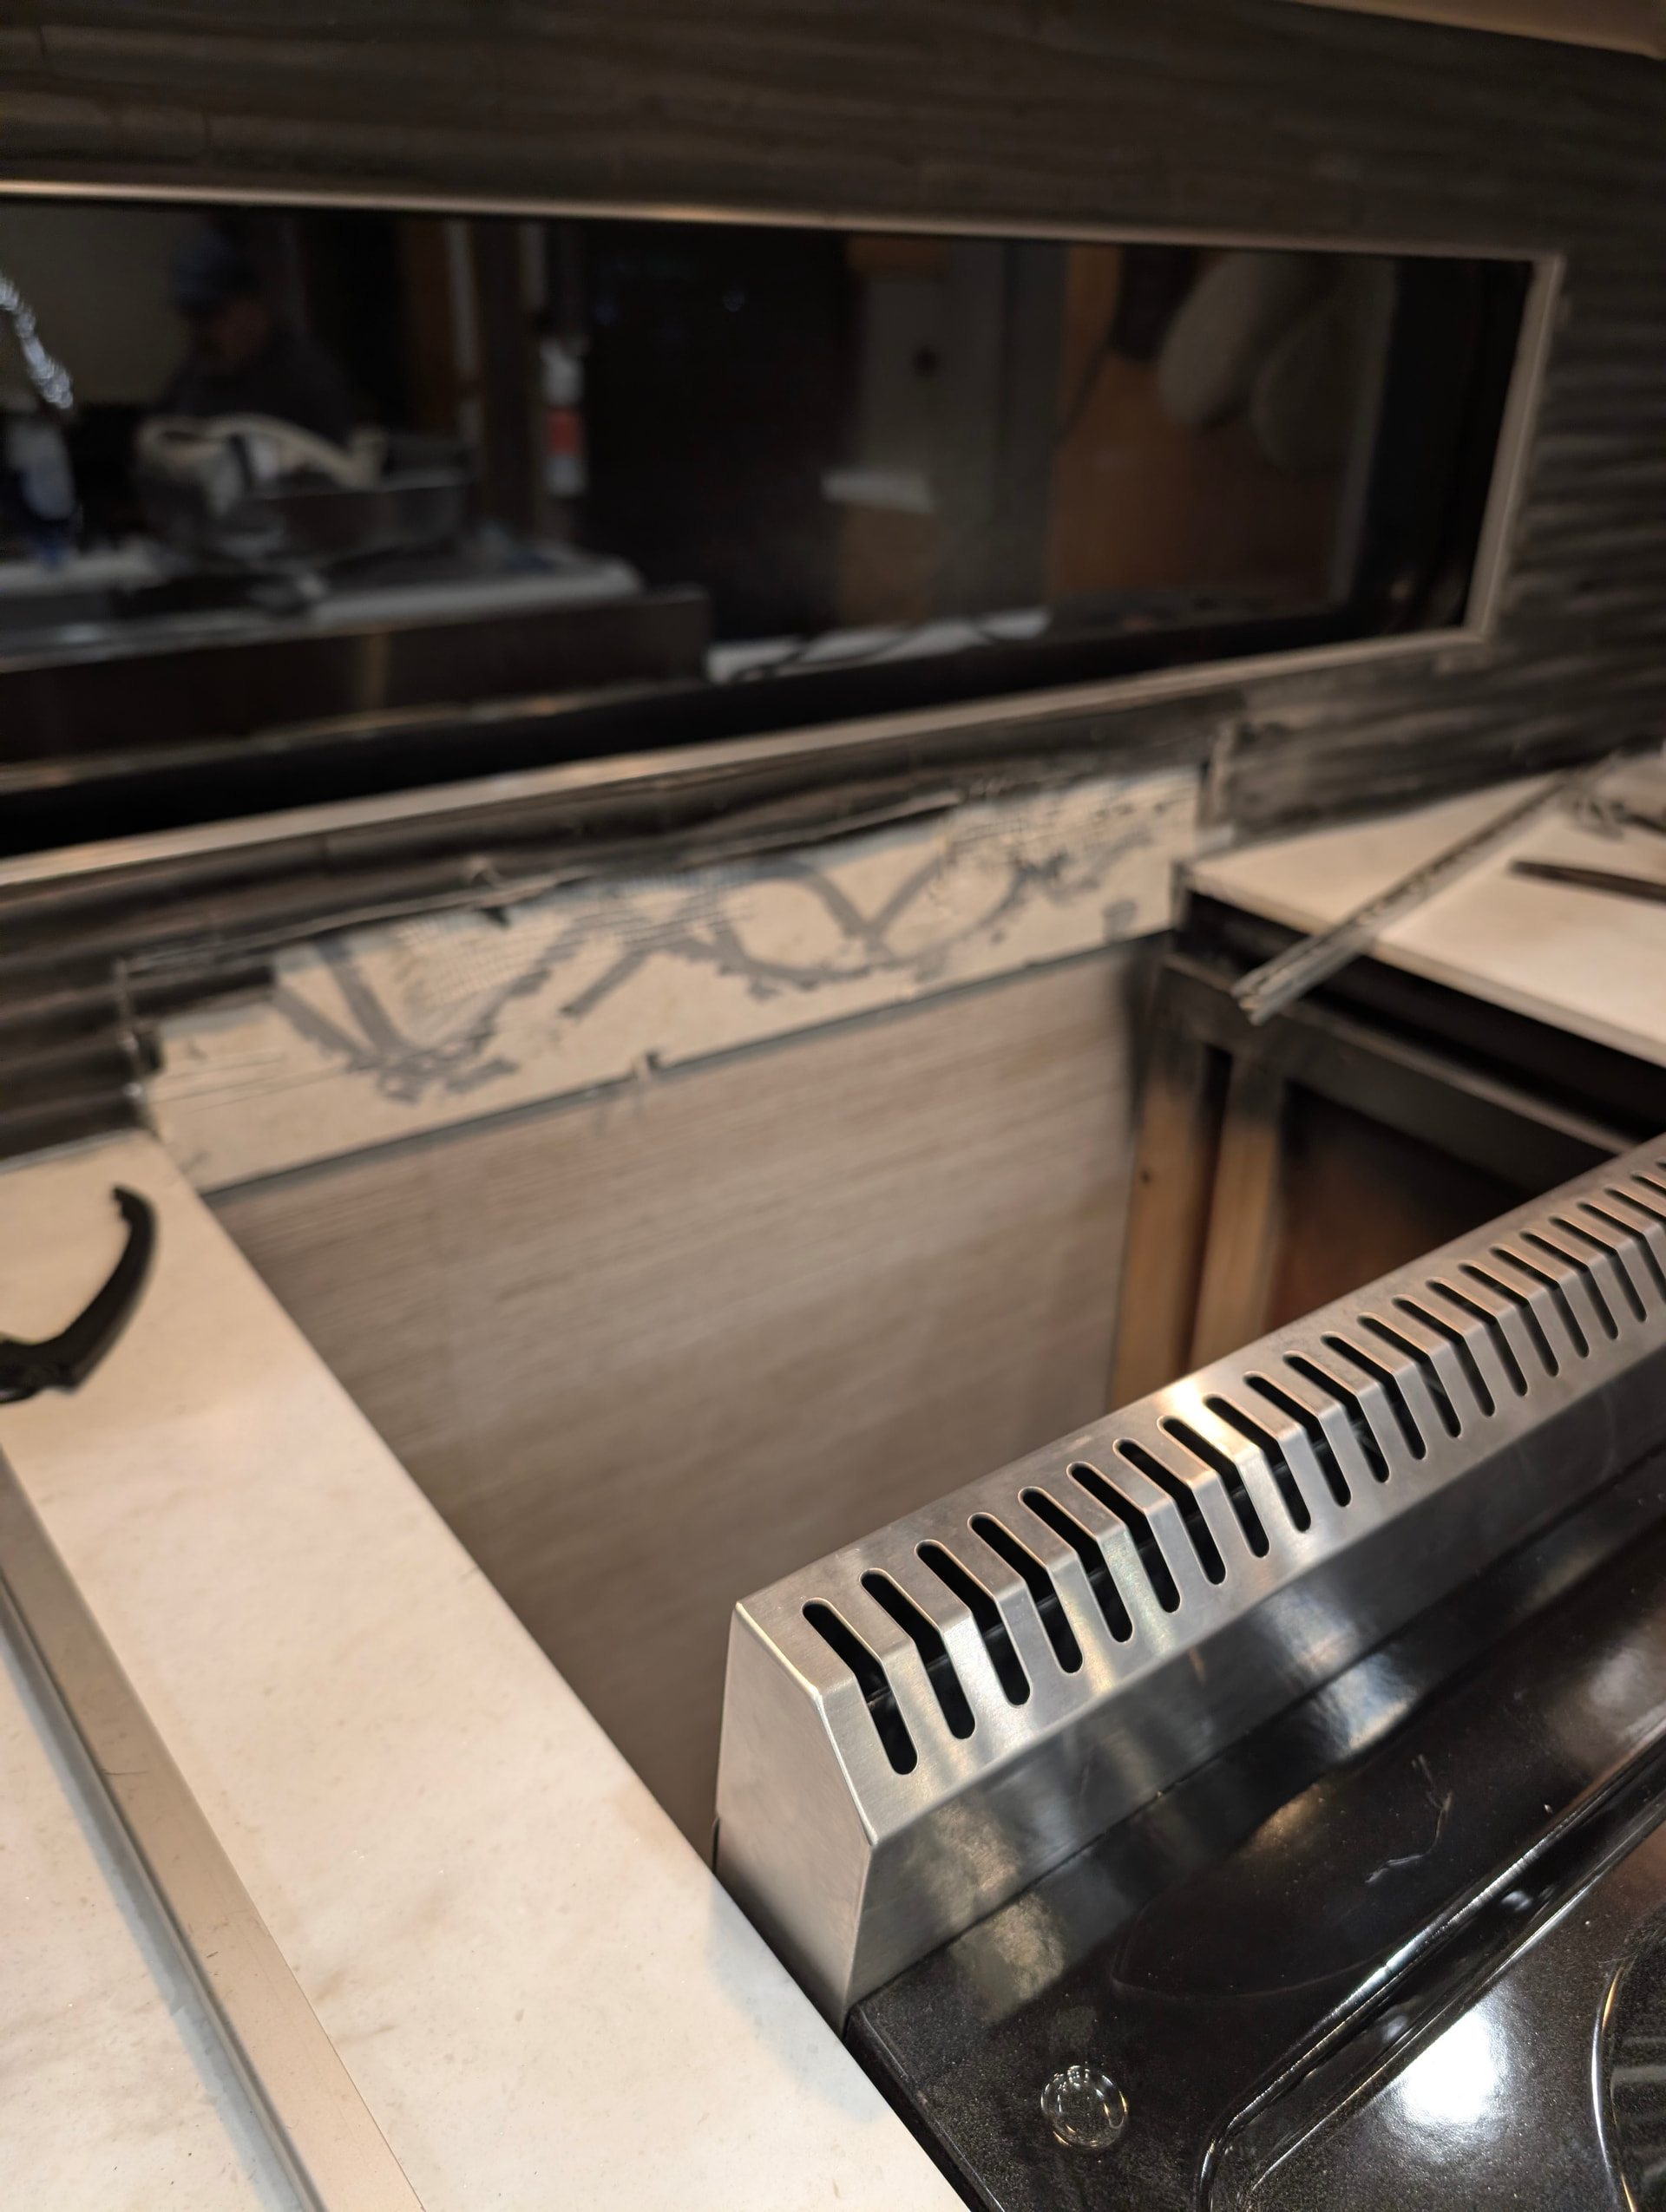
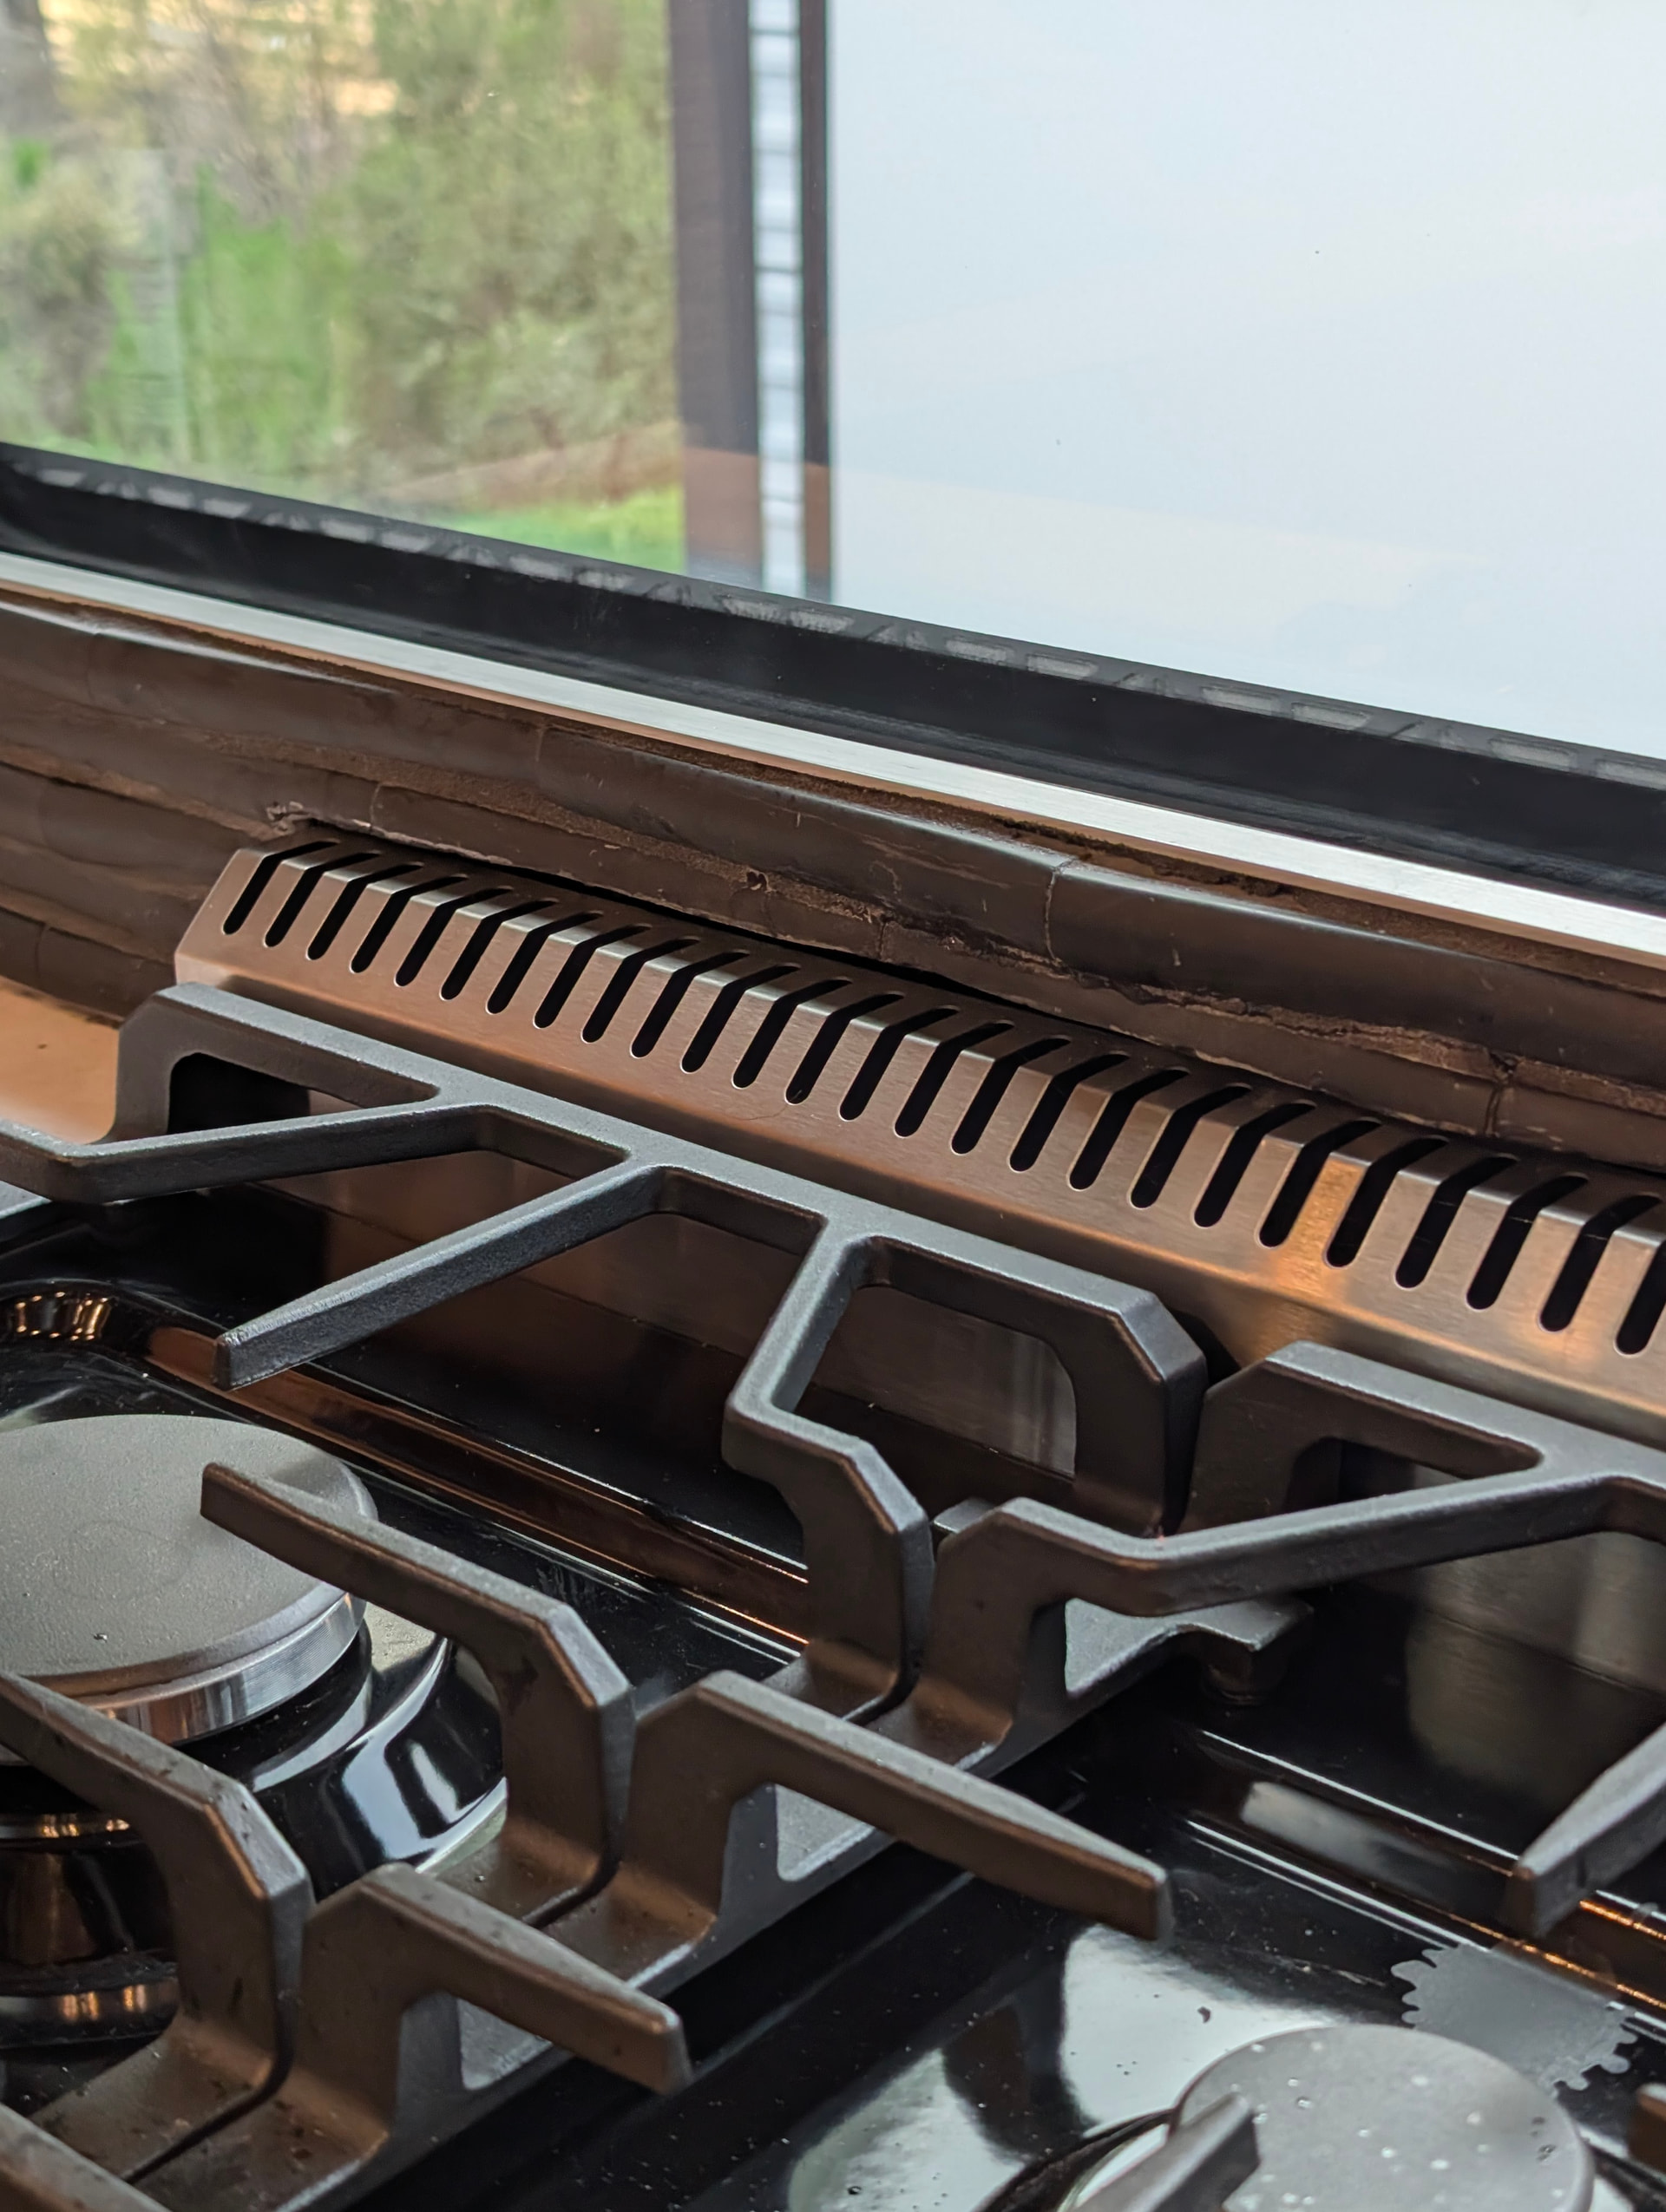
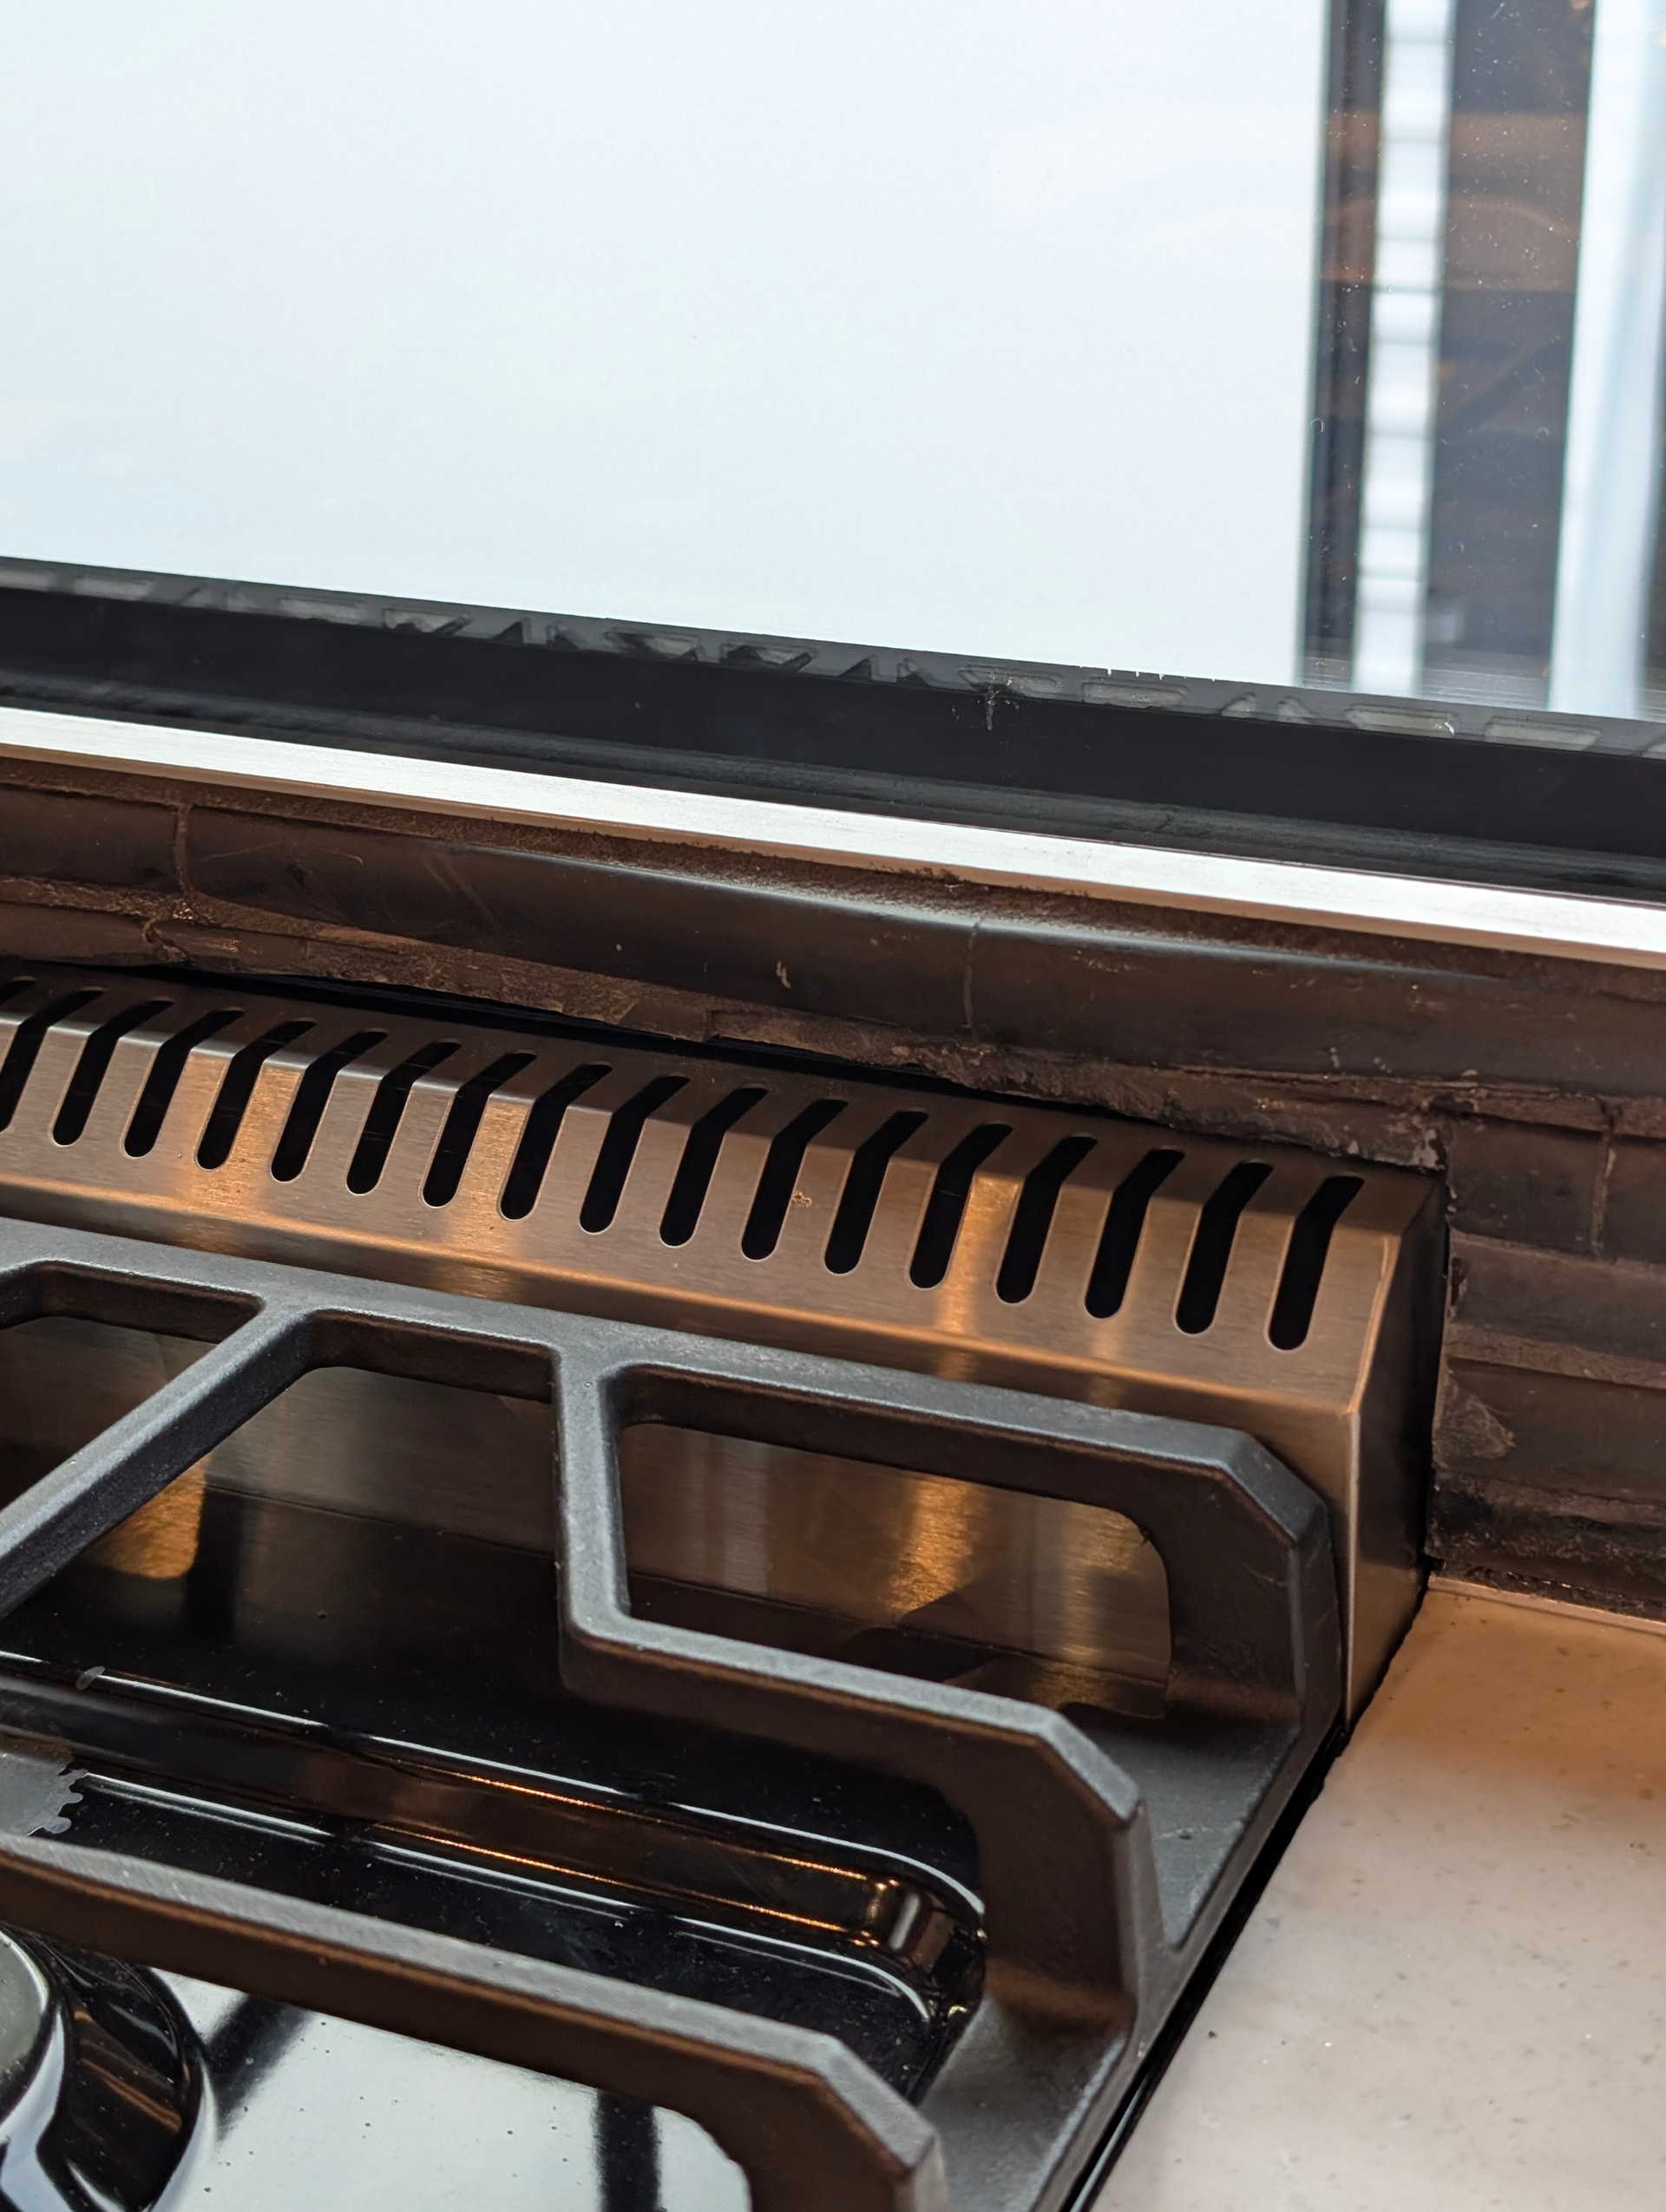
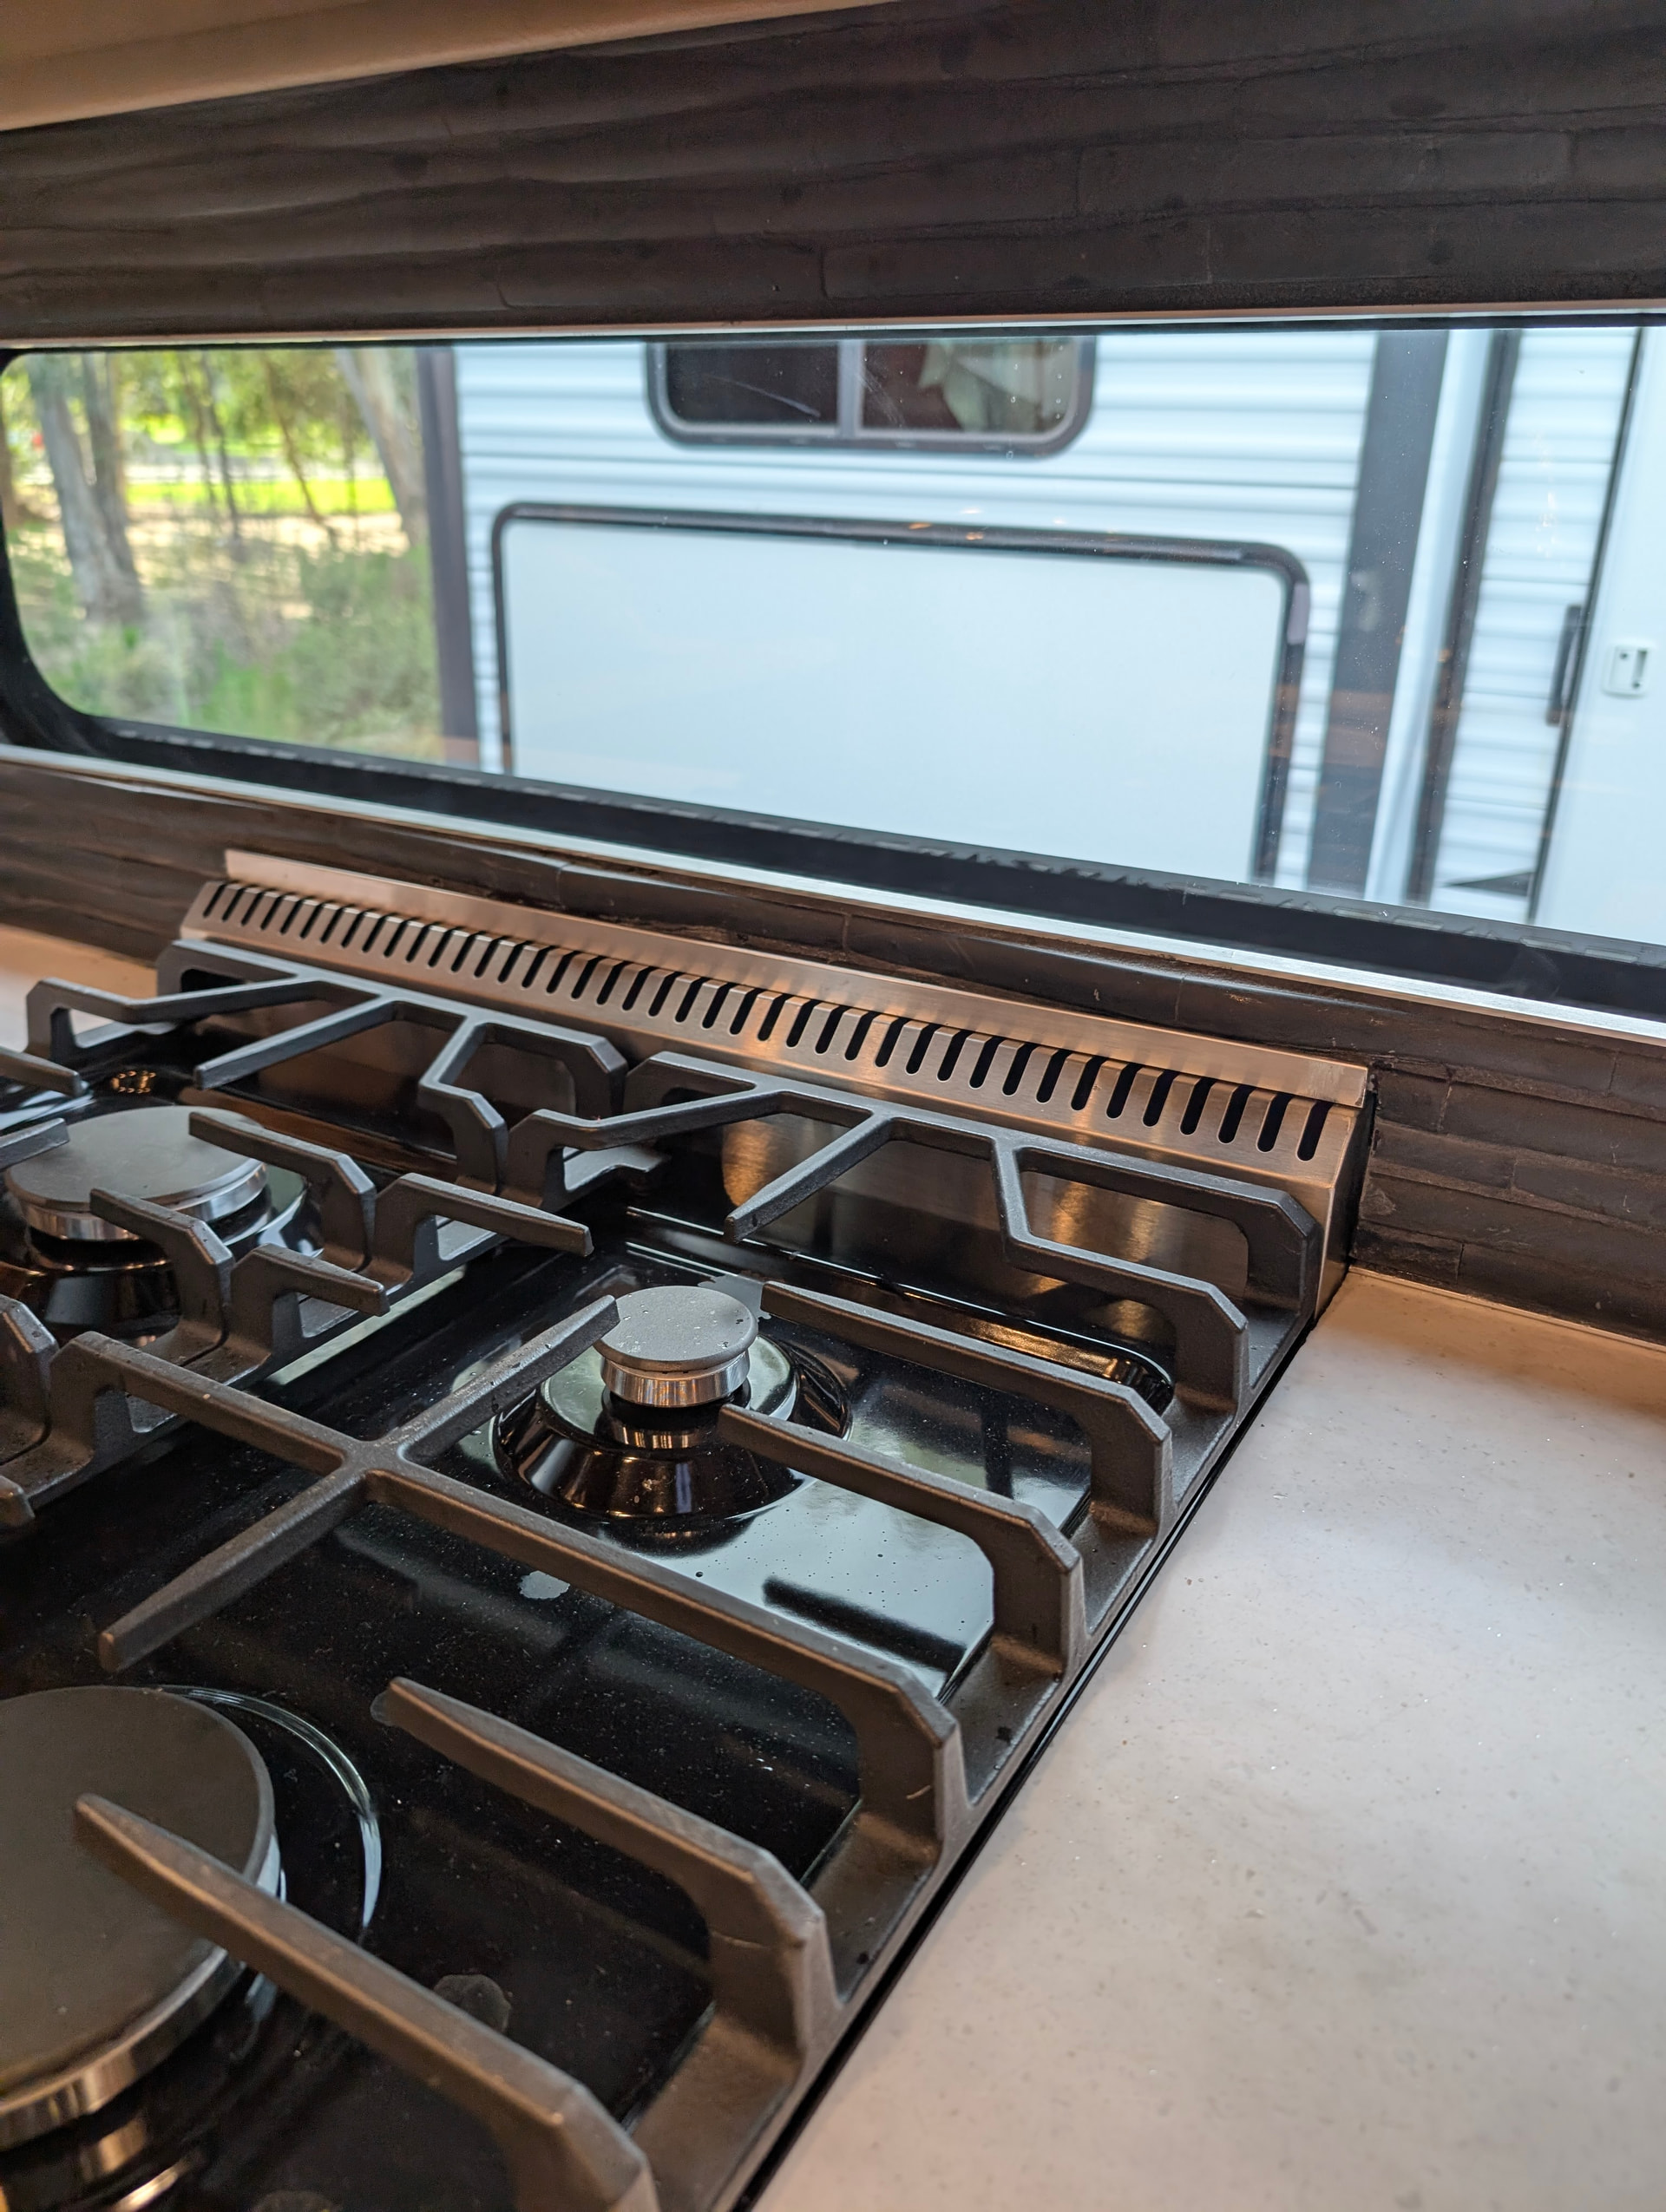
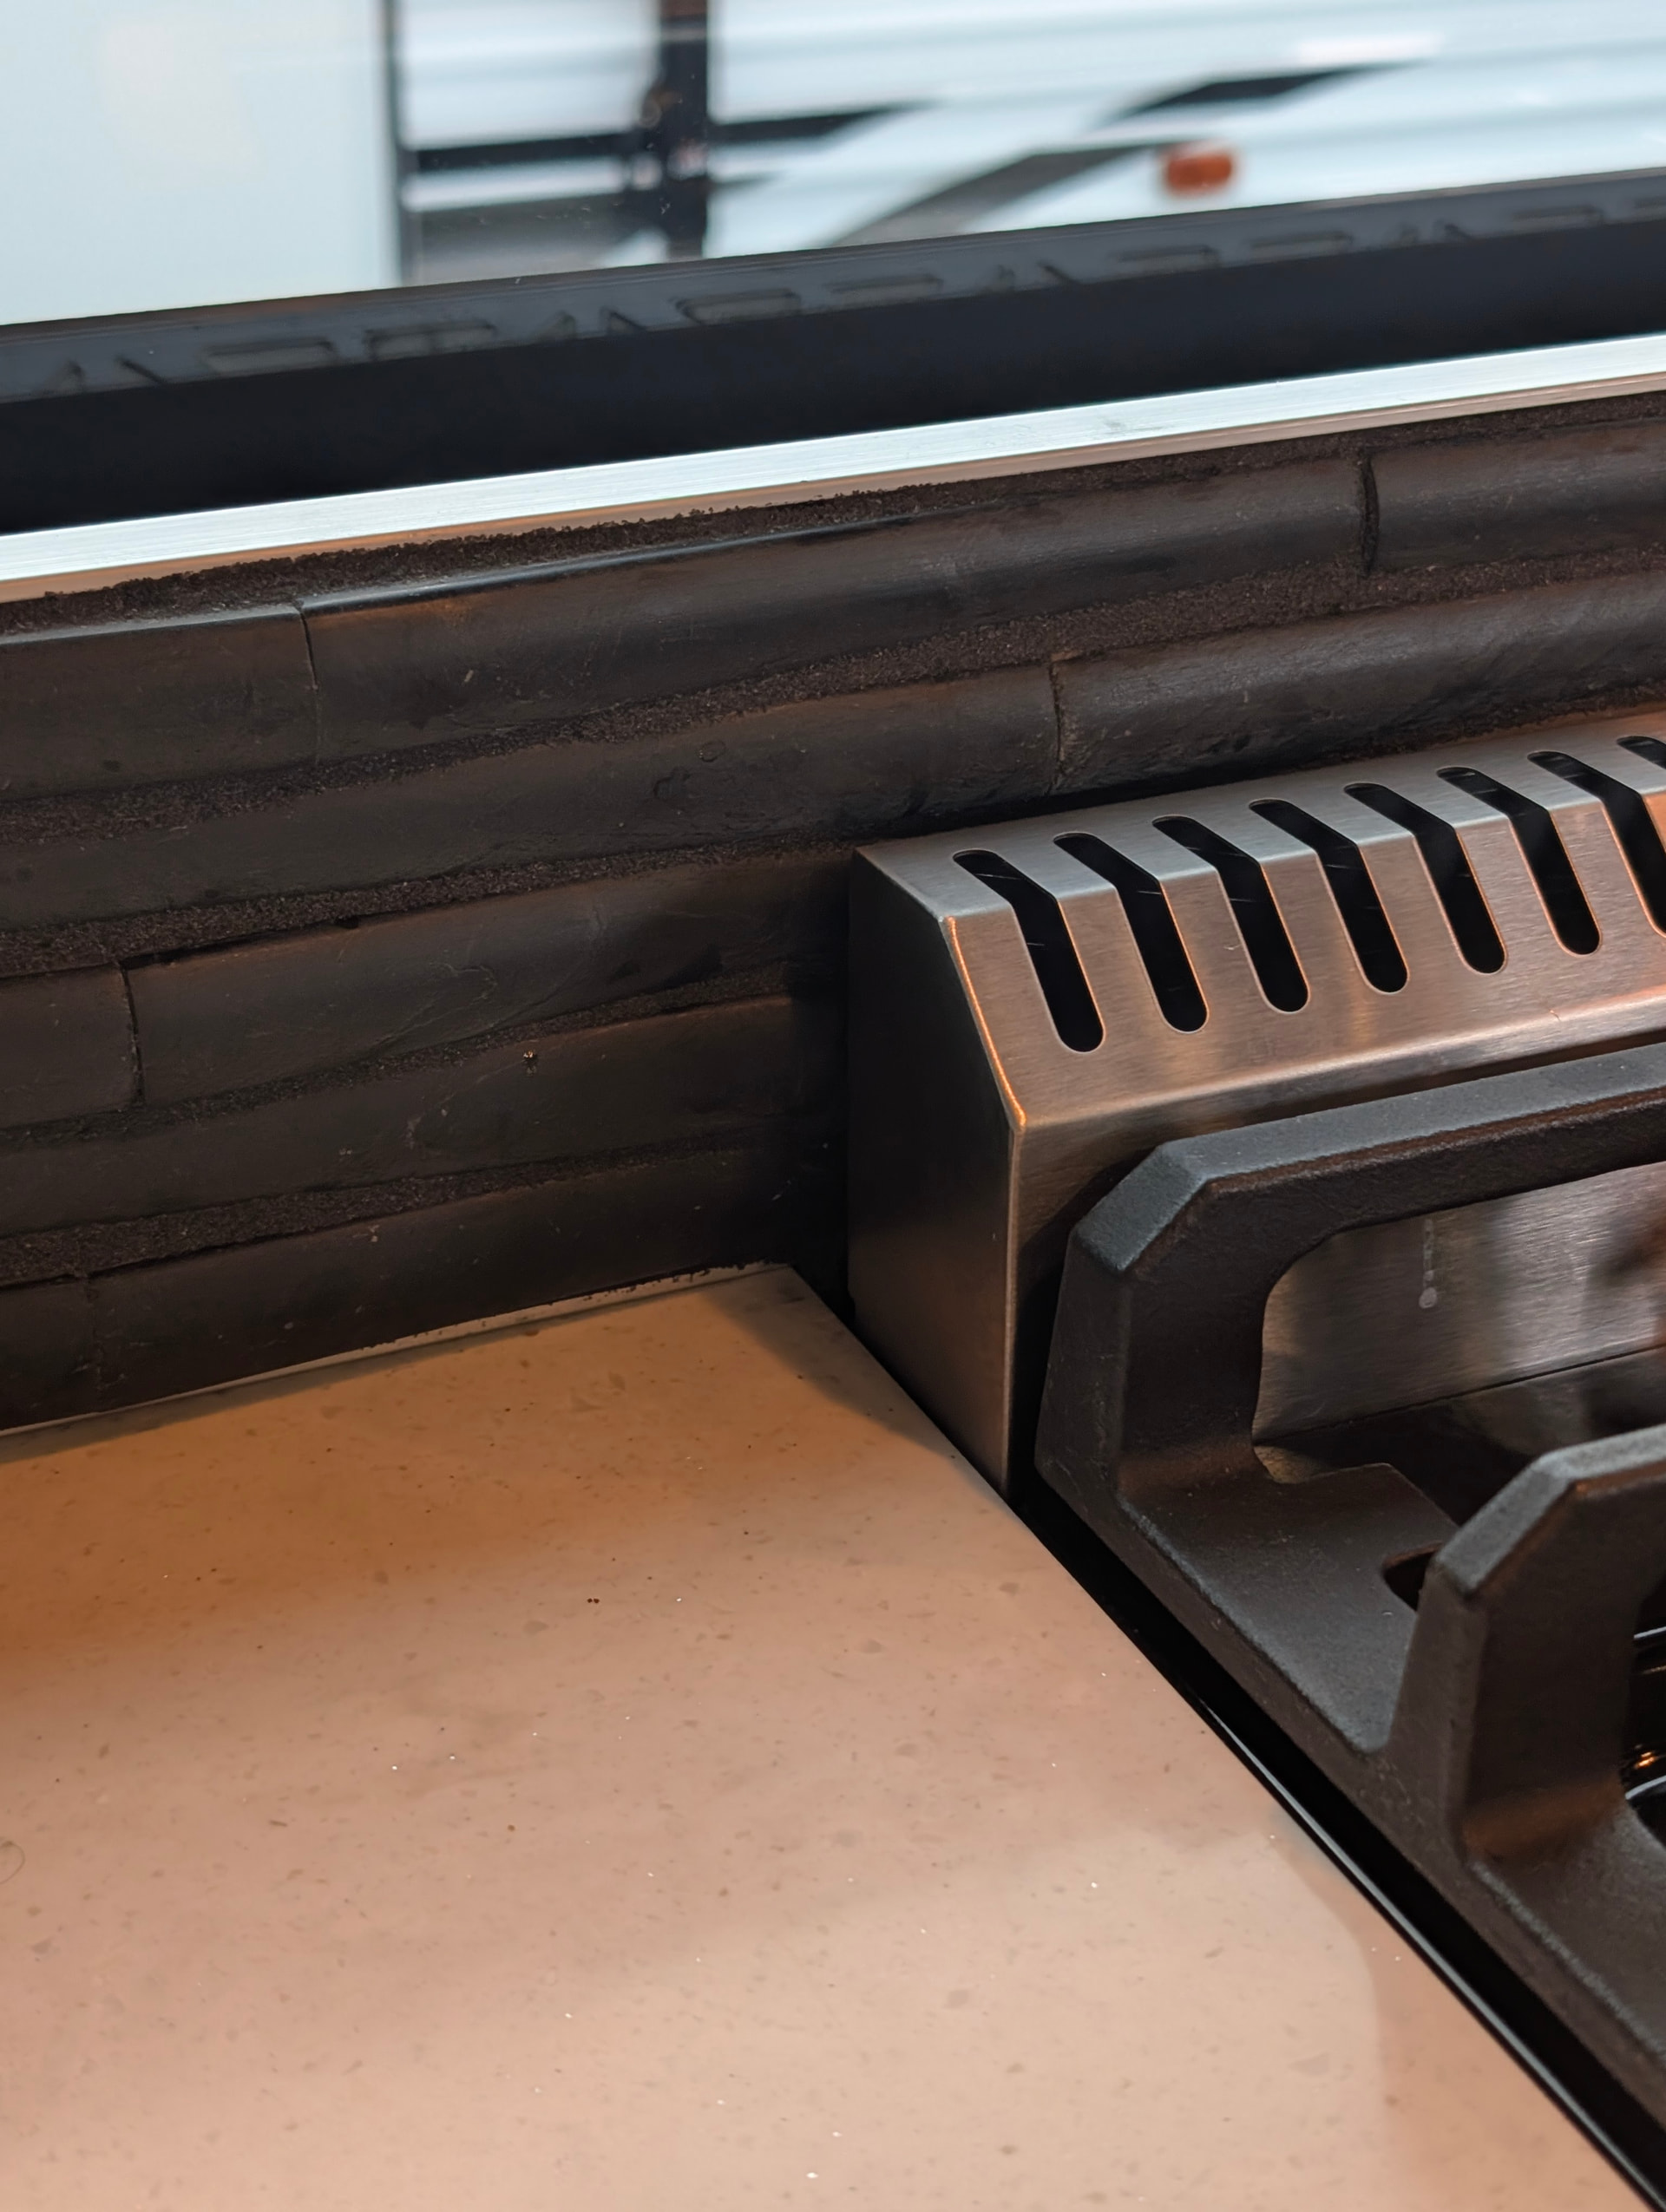
![]() After much delay, we finally had the new stove installed! Sadly, we couldn’t use the burners yet because they still needed conversion to LPG, which required, (according to the manual) a long 5/32 standard screwdriver to adjust the burner bypass valves. Alas, the 5/32 screwdriver did not fit in the bypass hole behind each knob. I found a a cheap set of precision screwdrivers at Lowes and tried each one until I found the proper fit - a 5/64 screwdriver was the correct size, ugh. I made the adjustments and we were off and running! Fast forward two weeks (today), (and the actual subject of this post), and we are preparing to change our brakes. Because we’ll be jacking up the rig, we need to start by bringing all the slides in. We saved the galley slide for last so one of us could keep a close eye on the new range to make sure it wasn’t going to hit the island. Remember I said that both stoves had the exact same measurements, but to my eye, the new one seemed like it stuck out farther. I removed the oven door handle and all 5 knobs. It looks like it’ll work; however, the oven knob is different from the others in that it has a shaft that protrudes an inch out of the face. Well, guess what? The oven knob shaft was going to hit the apron sink. Shit - now what do we do? The logical explanation is to slide the stove back another 1/2 to 3/4 inch to give us the clearance we need, but the backsplash is in the way. Oh heavans, we just jumped from the frying pan into the fire… Hubby decides the best way to fix it is to make a cutout in the backsplash allowing the stove to slide back a little more. Hasn’t happened yet cause he’s on his way to Harbor Freight to get a diamond blade for the multitool. Your picture though, has once again helped us to muddle through this. Thank you again. I’ll post pictures along the way.
After much delay, we finally had the new stove installed! Sadly, we couldn’t use the burners yet because they still needed conversion to LPG, which required, (according to the manual) a long 5/32 standard screwdriver to adjust the burner bypass valves. Alas, the 5/32 screwdriver did not fit in the bypass hole behind each knob. I found a a cheap set of precision screwdrivers at Lowes and tried each one until I found the proper fit - a 5/64 screwdriver was the correct size, ugh. I made the adjustments and we were off and running! Fast forward two weeks (today), (and the actual subject of this post), and we are preparing to change our brakes. Because we’ll be jacking up the rig, we need to start by bringing all the slides in. We saved the galley slide for last so one of us could keep a close eye on the new range to make sure it wasn’t going to hit the island. Remember I said that both stoves had the exact same measurements, but to my eye, the new one seemed like it stuck out farther. I removed the oven door handle and all 5 knobs. It looks like it’ll work; however, the oven knob is different from the others in that it has a shaft that protrudes an inch out of the face. Well, guess what? The oven knob shaft was going to hit the apron sink. Shit - now what do we do? The logical explanation is to slide the stove back another 1/2 to 3/4 inch to give us the clearance we need, but the backsplash is in the way. Oh heavans, we just jumped from the frying pan into the fire… Hubby decides the best way to fix it is to make a cutout in the backsplash allowing the stove to slide back a little more. Hasn’t happened yet cause he’s on his way to Harbor Freight to get a diamond blade for the multitool. Your picture though, has once again helped us to muddle through this. Thank you again. I’ll post pictures along the way.

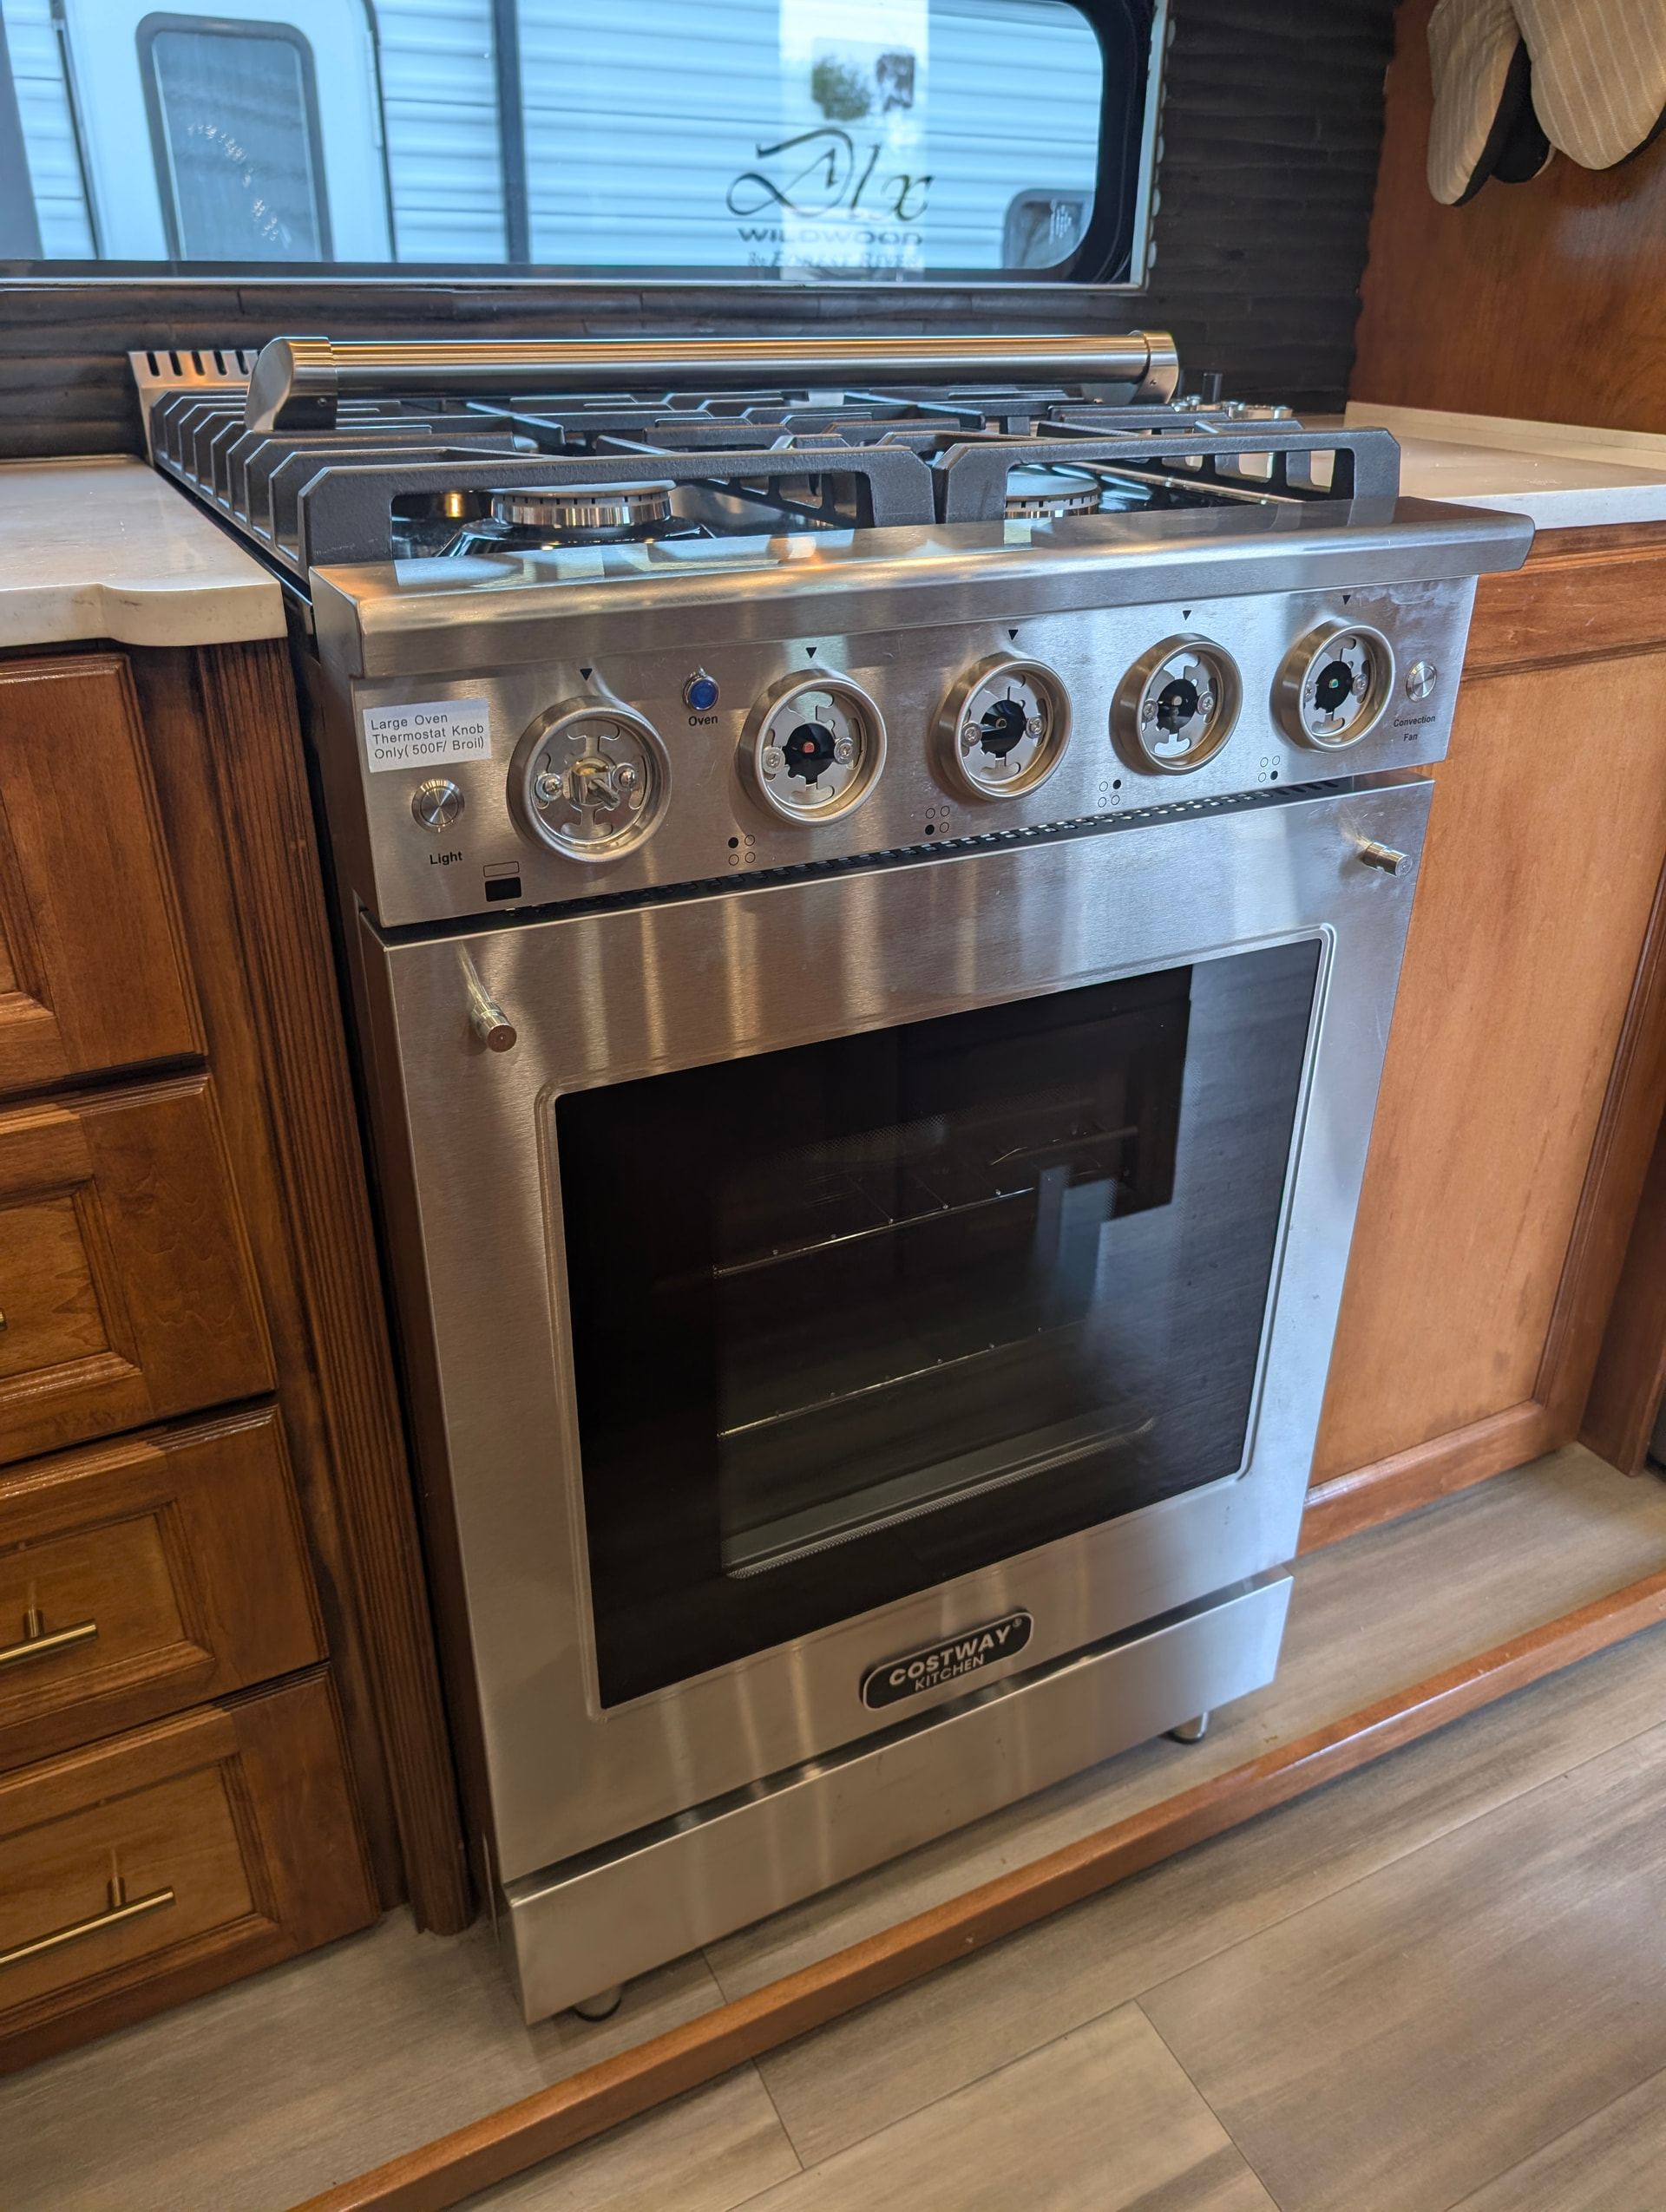
That is unfortunate! That shaft does stick out a lot on that oven. Throw us some pics when you get the backsplash cut and the oven moved back. Good luck!
Well, it took two days to cut the backsplash for the range. Two days because we started out using a bi-metal blade instead of a diamond coated blade. Even after procuring the right blade, it still took an incredibly long time making the cut because we were cutting the actual stone instead of the grout. The grout line was too high, hence the need to cut stone. That didn’t go smoothly either because pieces of the stone would chip out along the way and others just plain fell out. Needless to say, it’s not the prettiest of cuts, but I’ve found a work around for that and will post pictures once I’ve finished. In the meantime, I’ve repurposed the bottom piece of aluminum frame we removed to give it a cleaner look. The best part, of course, is that we did gain the inches necessary to keep clear of the island, although we still have to remove the oven door handle, which is super easy as it attaches with just two set screws. And, we finished the brakes and all the wheel bearings! Woohoo!